
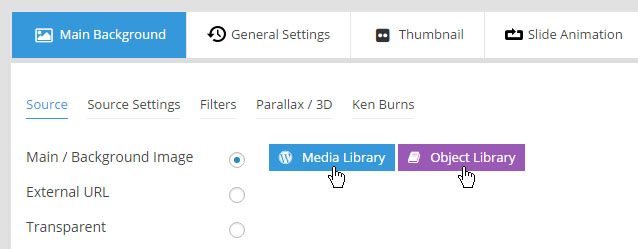
1. Set/Change Image
Upload or choose an image from your WP Media library, or use an image from the plugin’s Object Library.
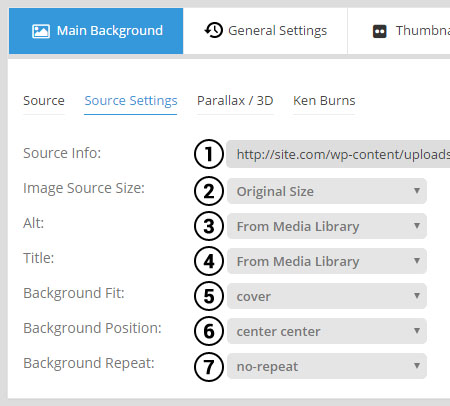
2. Source Settings
back to menu
1. Source Info
The absolute url to the selected image (read-only).
2. Image Source Size
When you upload an image to a Magento site, Magento will automatically create multiple size versions of the image that can be used. And for your slide’s main background image, you can choose which of these versions you’d like to use.
Common options are “Original Size”, “Medium” and “Large”. A reasonably sized main background image for web is around 1600×900 pixels. If your original images are larger than this, you can choose “Large” or “Medium” here, and this will help to improve page loading performance.
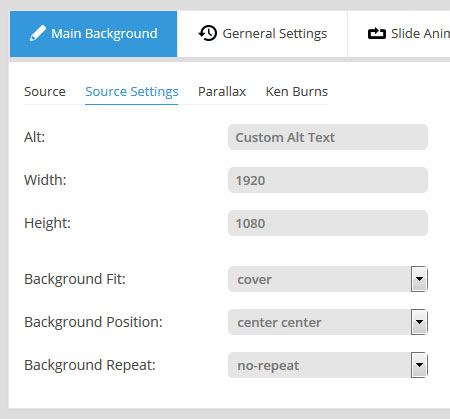
3. Alt Text (the SEO title for the image)
From Media Library:
Value is taken from “WP Menu -> Media -> Library -> Select Image -> Alt Text”.
From Filename:
Alt text will be the same as the name of the file (i.e. “my-image.jpg”).
Custom:
Enter your own custom text to be used as the image’s Alt Text.
4. Title (useful for certain lightbox information)
From Media Library:
Value is taken from “WP Menu -> Media -> Library -> Select Image -> Title”.
From Filename:
Title attribute will be the same as the name of the file (i.e. “my-image.jpg”).
Custom:
Enter your own custom text to be used as the image’s Title attribute.
5. Background Fit
Cover:
The most common option. This will ensure that your image will always fill the entire size of the slider (cropping may occur depending on the size ratio of the image in relation to the slider’s layout).
Contain:
Always fit the entire image inside the slider’s boundaries. Image cropping will never occur, but you may end up with blank space on the sides of the image (similar to a letterbox movie on an older television screen).
- Ideal Image Size
Curious about what the best size is for your images? Click here for some information about this topic.
6-7. Background Position / Background Repeat
Click here for information about “Background Position”.
Click here for information about “Background Repeat”.
3. Filters
back to menuAdd Instragram-type filters to your slide’s background image. Â Just select a filter and then view the slide’s editor canvas for a quick preview.

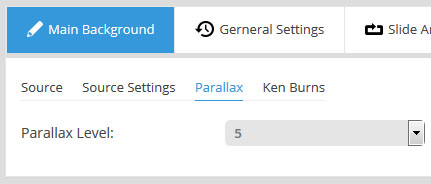
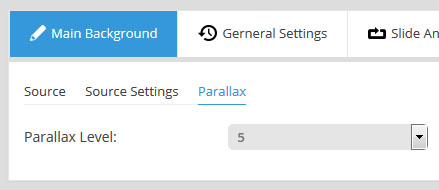
4. Parallax
back to menuParallax Level
To use this option, first make sure “Enable Parallax” is set to “ON” in the slider’s main parallax settings.
Adding a parallax level here will apply some movement to the main background based on mouse-move, scrolling, or both.
Check out the “Parallax Levels” part of the link above for help with choosing a “level” if you wish to use this option.
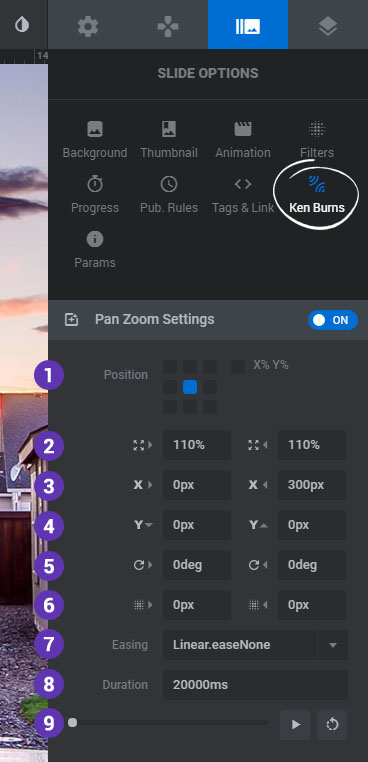
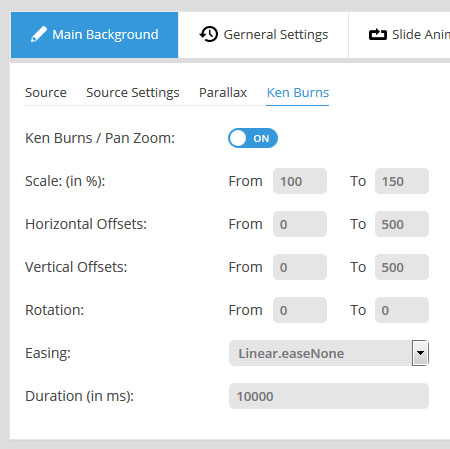
5. Ken Burns effect
back to menuAn elegant pan/zoom that will move and scale the main background image slowly after the slide comes into view.
Background Position
Position the image inside the slider. Â Click here for more information about image positioning.
Scale
From:Â The starting scale percentage of the image
To:Â The ending scale percentage of the image
If you want your image to “zoom in”, set the “From” value to “100” and the “To” value to something larger than 100 (such as 150, which means the image would scale up by 50%).
If you want your image to “zoom out”, set the “From” value to something larger than 100, and then the “To” value to “100”.
Horizontal / Vertical Offsets
These offset values are in relation to your main background image’s Background Position value (see section B above).
For example, if your Background Position is “center center”, entering a Horizontal Offset of “100” would mean 100px to the right of the very center, which would then serve as the starting position of the Ken Burns effect. And a Horizontal Offset of “-100” would be 100px to the left of center.
Rotation
Apply a starting and ending rotation for the effect. Smaller degrees such as 10-20 work best.
Blur Filter
Blur the image as its animated. Â A number between 5-20 is recommended.
Easing
“Easing” is what gives a web animation that “real life” type of movement. For a traditional Ken Burns effect, “Linear.easeNone” is usually the best choice. But you can test the other options to see which one you like best.
Duration
The total time the Ken Burns effect will last, in milliseconds (1000 = 1 second). It’s usually best to set this to the same number used for the slide’s delay value (“Edit Slide -> General Settings -> Slide Delay”).
And since version 5.3, preview your Ken Burns settings now right from within the editor:

1. Set URL to External Image
Type the full url of the image you wish to use from the external domain, and then click the “Get External” button.

2. Source Settings
back to menuAlt Text (the SEO title for the image)
Optional field to write an “alt” attribute for the loaded image. Useful for enhanced SEO.
Width / Height
Assign a width and height for the loaded image which will be used for resize calculations (it’s best to enter the loaded url’s actual width and height here).
Background Fit
Cover:
The most common option. This will ensure that your image will always fill the entire size of the slider (cropping may occur depending on the size ratio of the image in relation to the slider’s layout).
Contain:
Always fit the entire image inside the slider’s boundaries. Image cropping will never occur, but you may end up with blank space on the sides of the image (similar to a letterbox movie on an older television screen).
- Ideal Image Size
Curious about what the best size is for your images? Click here for some information about this topic.
Background Position / Background Repeat
Click here for information about “Background Position”.
Click here for information about “Background Repeat”.
3. Filters
back to menuAdd Instragram-type filters to your slide’s background image. Â Just select a filter and then view the slide’s editor canvas for a quick preview.
4. Parallax
back to menuParallax Level
To use this option, first make sure “Enable Parallax” is set to “ON” in the slider’s main parallax settings.
Adding a parallax level here will apply some movement to the main background based on mouse-move, scrolling, or both.
Check out the “Parallax Levels” part of the link above for help with choosing a “level” if you wish to use this option.
4. Ken Burns effect
back to menuAn elegant pan/zoom that will move and scale the main background image slowly after the slide comes into view.
Scale
From:Â The starting scale percentage of the image
To:Â The ending scale percentage of the image
If you want your image to “zoom in”, set the “From” value to “100” and the “To” value to something larger than 100 (such as 150, which means the image would scale up by 50%).
If you want your image to “zoom out”, set the “From” value to something larger than 100, and then the “To” value to “100”.
Horizontal / Vertical Offsets
These offset values are in relation to your main background image’s Background Position value (see section B above).
For example, if your Background Position is “center center”, entering a Horizontal Offset of “100” would mean 100px to the right of the very center, which would then serve as the starting position of the Ken Burns effect. And a Horizontal Offset of “-100” would be 100px to the left of center.
- Important Note
The main background image's "Background Position" (see section B above) plays an important role when setting up your Ken Burns effect.
For an example, set your "Scale To" value to "200", and your "Scale From" value to "100". Then set the image's "Background Position" to "center center" and preview the slide.
Then go back and change the "Background Position" to "top left", and this will give you a good idea of how the main image's "Background Position" impacts the Ken Burns animation.
Rotation
Apply a starting and ending rotation for the effect. Smaller degrees such as 10-20 work best.
Easing
“Easing” is what gives a web animation that “real life” type of movement. For a traditional Ken Burns effect, “Linear.easeNone” is usually the best choice. But you can test the other options to see which one you like best.
Duration
The total time the Ken Burns effect will last, in milliseconds (1000 = 1 second). It’s usually best to set this to the same number used for the slide’s delay value (“Edit Slide -> General Settings -> Slide Delay”).
And since version 5.3, preview your Ken Burns settings now right from within the editor:
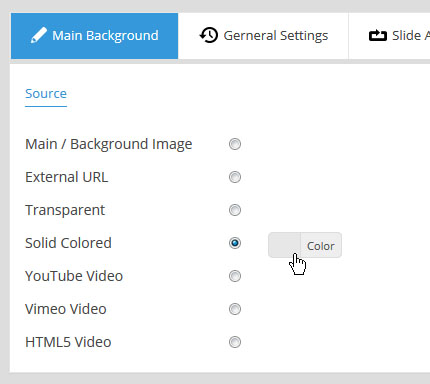
Transparent Background
i.e. “No Slide Background”. Useful for when you want to use a single background image for your entire slider.
Solid Colored Background
Use a solid color as the slide’s main background. Click the “Color” button to choose a color.

1. Set YouTube ID and Poster Image
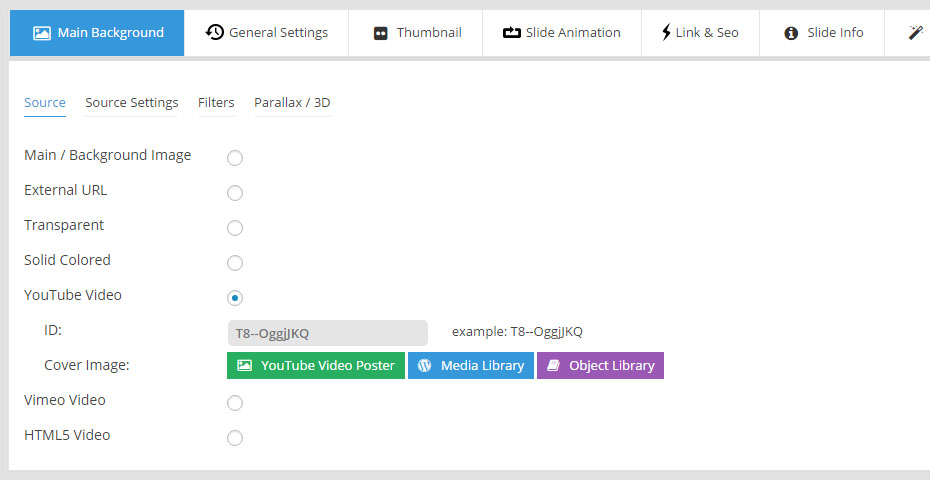
Set YouTube ID
To get your YouTube ID, visit the video on YouTube.com, and view the url in the browser’s address bar.
The ID will be after the “v=” part of the url. In the following url example, the ID is “ZmKdKZOX72Y”.
|
1 2 3 |
https://www.youtube.com/watch?v=ZmKdKZOX72Y |
Set Cover Image (required)
The video’s “cover” is what will animate when the slide first appears.
Click the “Change Image” button to set a poster for the video, chosen from your Magento Media library.  Or select the “YouTube Video Poster” to grab the image directly from YouTube.com.  Or select one of the available images from the Object Library.
The video’s “cover” is what will animate when the slide first appears.
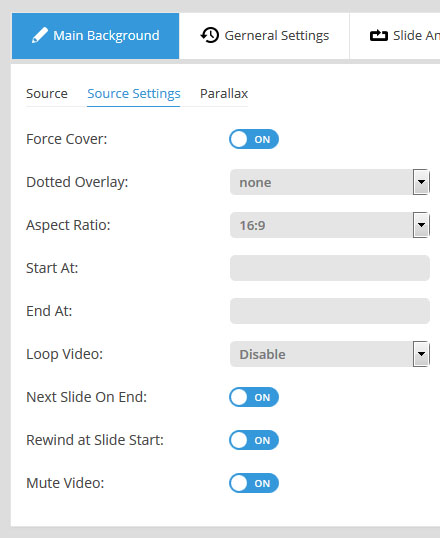
2. Source Settings
back to menuForce Cover
ON: Have the video cover the entire size of the slider (usually the best option for video backgrounds). Depending on the video’s Aspect Ratio in relation to the slider’s size, cropping may occur.
OFF: The video will always respect its Aspect Ratio, and will never be cropped. Depending on the video’s Aspect Ratio in relation to the slider’s size, blank space on the sides of the video may occur.
Dotted Overlay
Choose to display a “mesh-like” transparent graphic on top of the video, adding some extra style to the video.
Aspect Ratio
YouTube offers 2 versions of the video that can be loaded which are 16×9 or 4×3. For video backgrounds, 16×9 is usually best.
Start At / End At
Choose to start and/or end the video at a specific time, in minutes:seconds format.
Example “Start At” value: 00:17 (start the video 17 seconds in)
Example “End At” value: 02:17 (end the video at 2 minutes, 17 seconds)
Loop Video
Disable:
Video will only play once each time the slide is shown.
Loop – Slide is paused:
Video will loop endlessly, and the slide will never change unless the slider’s navigation is used (next button clicked, etc.).
Loop – Slide does not stop:
Video will loop endlessly until the slide’s delay is reached. For example, if your slide’s are normally meant to be shown for 10 seconds, but your video’s length is only 5 seconds, the video will play twice before the slide actually changes.
Next Slide On End
ON: Slide will immediately change as soon as the video ends.
OFF: If video’s length is less than the slide’s delay, the slide will not change until the delay time has been reached.
Rewind at Slide Start
ON: Video will always start from the beginning each time the slide is shown.
OFF: Once the video plays, if the slide is changed before the video actually ends, when coming back to the same slide, the video will resume playing from the same point.
Mute Video
Choose to mute the video’s volume if it normally has sound.
Video Speed
A special option to play the video at a “fast forward” speed.
Arguments
Additional parameters that can be passed to the video from this list.
Not all params are supported, but useful options from the list are “rel”, “iv_load_policy”, and “modestbranding” (see link above for descriptions of these params).
To add an additional parameter, prepend it to the beginning of the default params string.
For example, this:
|
1 2 3 |
hd=1&wmode=opaque&showinfo=0&ref=0; |
would become this:
|
1 2 3 |
rel=0&hd=1&wmode=opaque&showinfo=0&ref=0; |

3. Parallax
back to menuParallax Level
To use this option, first make sure “Enable Parallax” is set to “ON” in the slider’s main parallax settings.
Adding a parallax level here will apply some movement to the main background based on mouse-move, scrolling, or both.
Check out the “Parallax Levels” part of the link above for help with choosing a “level” if you wish to use this option.
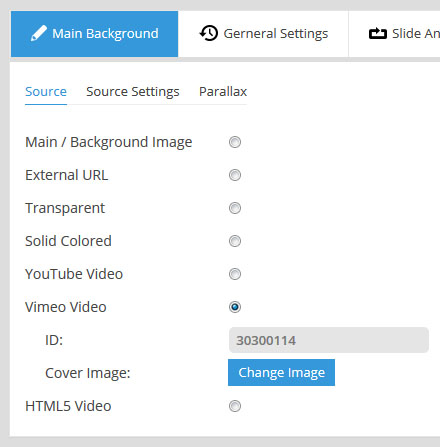
1. Set Vimeo ID and Poster Image
Set Vimeo ID
To get your Vimeo ID, visit the video on vimeo.com, and view the url in the browser’s address bar.
The ID will be after the “vimeo.com/” part of the url. In the following url example, the ID is “118046336”.
|
1 2 3 |
https://vimeo.com/118046336 |
Set Cover Image (required)
Click the “Change Image” button to set a poster for the video, chosen from your Magento Media library.
The video’s “cover” is what will animate when the slide first appears.
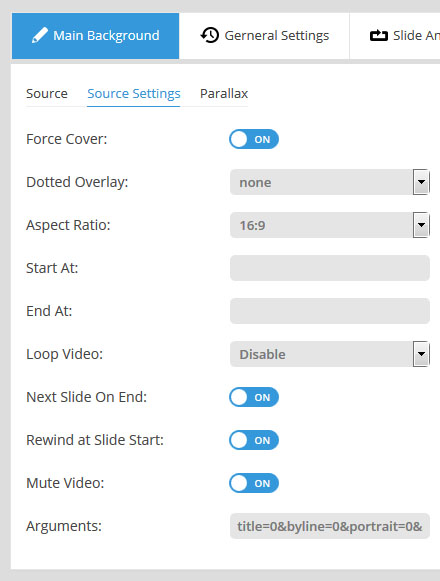
2. Source Settings
back to menuForce Cover
ON: Have the video cover the entire size of the slider (usually the best option for video backgrounds). Depending on the video’s Aspect Ratio in relation to the slider’s size, cropping may occur.
OFF: The video will always respect its Aspect Ratio, and will never be cropped. Depending on the video’s Aspect Ratio in relation to the slider’s size, blank space on the sides of the video may occur.
Dotted Overlay
Choose to display a “mesh-like” transparent graphic on top of the video, adding some extra style to the video.
Aspect Ratio
Vimeo offers 2 versions of the video that can be loaded which are 16×9 or 4×3. For video backgrounds, 16×9 is usually best.
Start At / End At
Choose to start and/or end the video at a specific time, in minutes:seconds format.
Example “Start At” value: 00:17 (start the video 17 seconds in)
Example “End At” value: 02:17 (end the video at 2 minutes, 17 seconds)
Loop Video
Disable:
Video will only play once each time the slide is shown.
Loop – Slide is paused:
Video will loop endlessly, and the slide will never change unless the slider’s navigation is used (next button clicked, etc.).
Loop – Slide does not stop:
Video will loop endlessly until the slide’s delay is reached. For example, if your slide’s are normally meant to be shown for 10 seconds, but your video’s length is only 5 seconds, the video will play twice before the slide actually changes.
Next Slide on End
ON: Slide will immediately change as soon as the video ends.
OFF: If video’s length is less than the slide’s delay, the slide will not change until the delay time has been reached.
Rewind at Slide Start
ON: Video will always start from the beginning each time the slide is shown.
OFF: Once the video plays, if the slide is changed before the video actually ends, when coming back to the same slide, the video will resume playing from the same point.
Mute Video
Choose to mute the video’s volume if it normally has sound.
Arguments
Additional parameters that can be passed to the video from this list.
Useful options from the list are “color” and “title” (see link above for descriptions of these params).
To add an additional parameter, prepend it to the beginning of the default params string.
For example, this:
|
1 2 3 |
title=0&byline=0&portrait=0&api=1 |
would become this:
|
1 2 3 |
color=00adef&title=0&byline=0&portrait=0&api=1 |
3. Parallax
back to menuParallax Level
To use this option, first make sure “Enable Parallax” is set to “ON” in the slider’s main parallax settings.
Adding a parallax level here will apply some movement to the main background based on mouse-move, scrolling, or both.
Check out the “Parallax Levels” part of the link above for help with choosing a “level” if you wish to use this option.
1. Set Video URLS and Poster Image
A. Set Video URLS
Upload a video to your site via ftp, and enter the full url of the video in the fields shown in the screenshot below, or click the “Change Video” button to choose a video from your Magento Media library.
An “MPEG” version of your video (a file ending with “.mp4”) is mandatory.
MPEG will work almost everywhere except Firefox on Macs. Because of this, it’s also important to include an alternative version of the video, which can be either “WEBM” or “OGV”. Firefox on Mac supports both of these, so you only need one or the other.
Here’s a free tool you can use to create “ogv” and “webm” versions of your video.
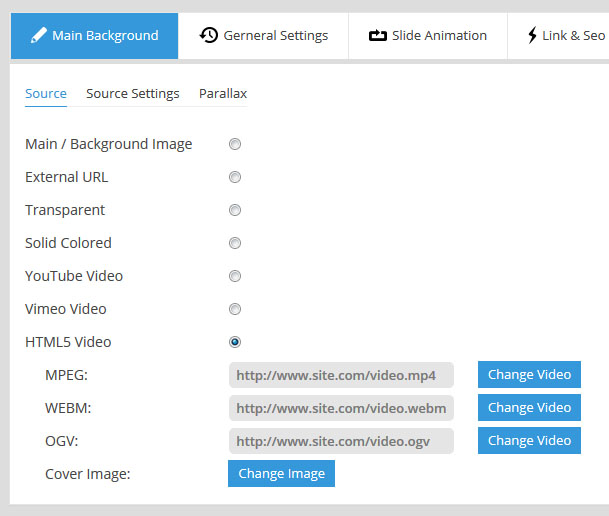
Set Cover Image (required)
Click the “Change Image” button to set a poster for the video, chosen from your Magento Media library. The video’s “cover” is what will animate when the slide first appears.
2. Source Settings
back to menuForce Cover
ON: Have the video cover the entire size of the slider (usually the best option for video backgrounds). Depending on the video’s Aspect Ratio in relation to the slider’s size, cropping may occur.
OFF: The video will always respect its Aspect Ratio, and will never be cropped. Depending on the video’s Aspect Ratio in relation to the slider’s size, blank space on the sides of the video may occur.
Dotted Overlay
Choose to display a “mesh-like” transparent graphic on top of the video, adding some extra style to the video.
Aspect Ratio
Choose which aspect ratio the video should be resized by. For video backgrounds, 16×9 is usually best.
Start At / End At
Choose to start and/or end the video at a specific time, in minutes:seconds format.
Example “Start At” value: 00:17 (start the video 17 seconds in)
Example “End At” value: 02:17 (end the video at 2 minutes, 17 seconds)
Loop Video
Disable:
Video will only play once each time the slide is shown.
Loop – Slide is paused:
Video will loop endlessly, and the slide will never change unless the slider’s navigation is used (next button clicked, etc.).
Loop – Slide does not stop:
Video will loop endlessly until the slide’s delay is reached. For example, if your slide’s are normally meant to be shown for 10 seconds, but your video’s length is only 5 seconds, the video will play twice before the slide actually changes.
Next Slide at End
ON: Slide will immediately change as soon as the video ends.
OFF: If video’s length is less than the slide’s delay, the slide will not change until the delay time has been reached.
Rewind at Slide Start
ON: Video will always start from the beginning each time the slide is shown.
OFF: Once the video plays, if the slide is changed before the video actually ends, when coming back to the same slide, the video will resume playing from the same point.
Mute Video
Choose to mute the video’s volume if it normally has sound.
3. Parallax
back to menuParallax Level
To use this option, first make sure “Enable Parallax” is set to “ON” in the slider’s main parallax settings.
Adding a parallax level here will apply some movement to the main background based on mouse-move, scrolling, or both.
Check out the “Parallax Levels” part of the link above for help with choosing a “level” if you wish to use this option.
If you’re using a special content source such as a “Post-based Slider” or “Instagram”, you’ll be presented with one of the 3 new options shown in the screenshot to the right.
Special background source options and related background source settings listed below.
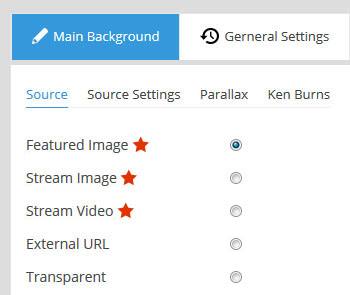
Post-based Slider / Specific Posts
Special Source Options:
Featured Image
Special Source Settings:
Identical to “Regular Image” tab above
Special Source Options:
Stream Image, Stream Video
Stream Image -> Source Settings:
Identical to “Regular Image” tab above
Stream Video->Â Source Settings:
Identical to “HTML5 Video” tab above
Flickr / Twitter / Facebook
Special Source Options:
Stream Image
Special Source Settings:
Identical to “Regular Image” tab above
YouTube / Vimeo
Special Source Options:
Stream Video
YouTube -> Stream Video -> Source Settings:
Identical to “YouTube” tab above
Vimeo ->Â Stream Video -> Source Settings:
Identical to “Vimeo” tab above