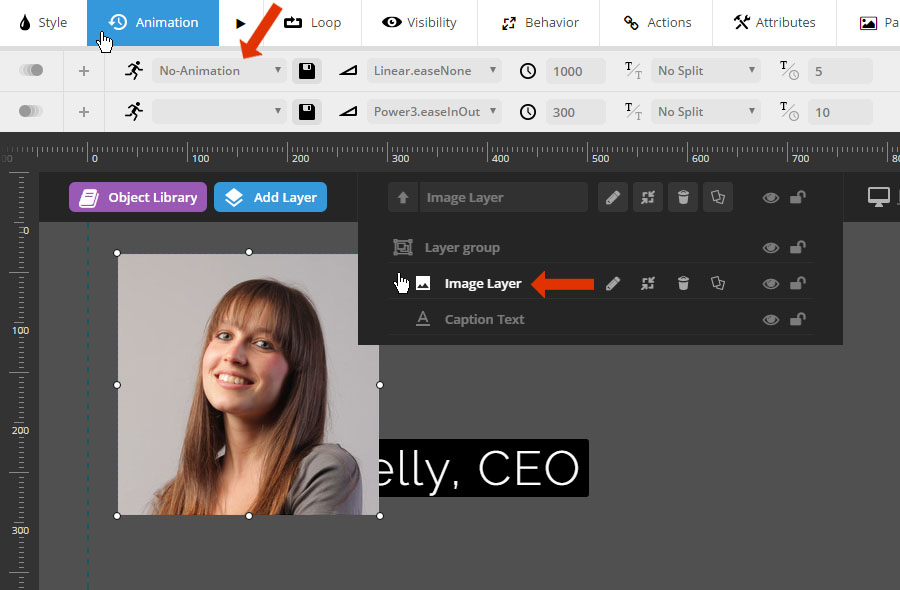
When setting your layer animations, choose from one of the 30+ animation templates that’s closest to your desired look. Then this will act as a “preset” of settings that can adjusted further.

When setting your layer animations, choose from one of the 30+ animation templates that’s closest to your desired look. Then this will act as a “preset” of settings that can adjusted further.
After adding a layer to the slide, and selecting it in the preview canvas, when you click the “Animation” tab, you’ll see a live preview of the layer’s animation.
Click the “Pause” button to stop the admin preview. And then click the same button to preview your animation once again.

Every content layer has a “Start” animation that will happen when the layer first appears, and an “End” animation for when the layer disappears.
The actual time when these animations take place will depend on the layer’s “Visible Timeline”, which is set in the Layers Timing and Sorting part of the slide’s admin.


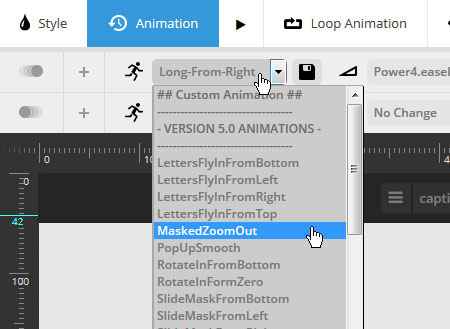
1. Animation Template
Choose from over 30+ prebuilt animations. And preview each option by clicking the “Play” button next to the “Animation” tab.
2. Animation Easing
“Easing” is what gives a web animation that “real life” type of movement. Choose between over 35 options to see which one you like best. The most commonly used options are “Power2.easeOut”, and “Power3.easeOut”.
3. Animation Speed
How long the animation will last from start to finish in milliseconds (1000 = 1 second).
An optimal number will depend on your chosen animation. For example, when using a simple “Fade”, a number between 300-500 is usually best, but for more complex animations (especially when using an “easeInOut” easing), a higher number such as 500-1000 will work well.
4. Animate by Words, Letters or Lines
For text-based layers, you can animate words, letters or lines one by one with this option.
Choose “No Split” to just animate the entire layer at once.
5. Split Animation Direction
Choose which direction to animate your splitted words/letters/lines. Â Options are “forward”, “backward”, “middle to edge” and “edge to middle” or “random”.
6. Split Animation Delay
When animating by words, letters or lines, the essence of the effect is that each will animate one after the other. The delay value here is the amount of time that will be used for this sequenced animation.
The delay value is in milliseconds. A number between 5-30 usually works best.
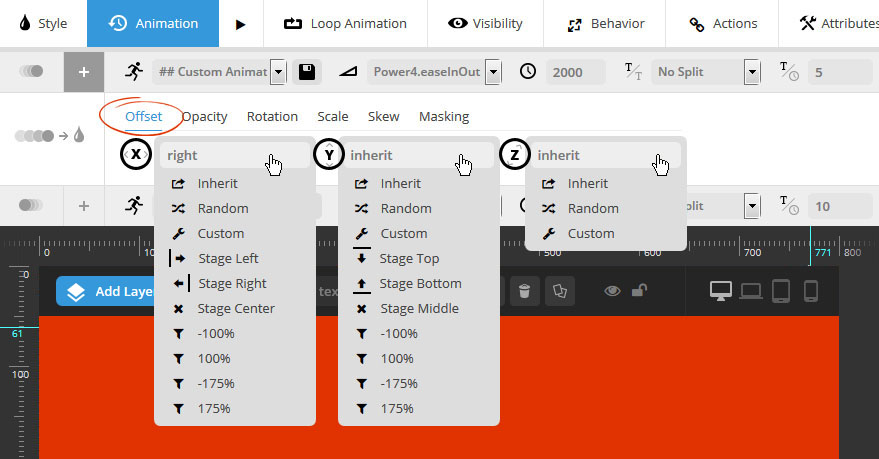
Click the “+” button as shown in the following screenshot to edit the “Start” or “End” animation’s advanced settings.
START Animation Settings = Animate FROM these settings
END Animation Settings = Animate TO these settings

X = Horizontal Axis
Y = Vertical Axis
Z = 3D Axis
Choose “Inherit” to honor the animation’s original settings, “Custom” to enter a specific pixel value, or try out one of the other options to see which one you like best.
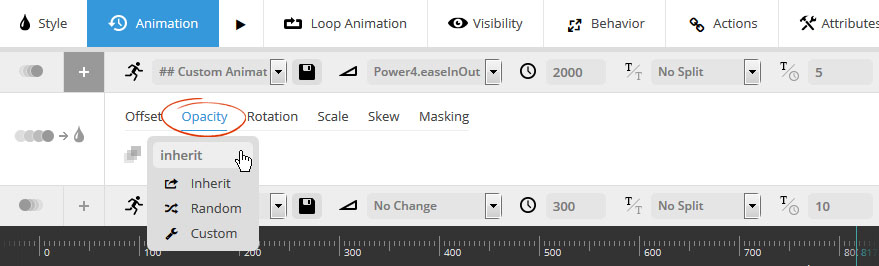
Adjust the animation’s Opacity (i.e. “transparency”) level.
Choose “Inherit” to honor the animation’s default setting, “Random” to always randomize the value each time the slide is shown, or “Custom” to enter a special value (a number between 0-1).
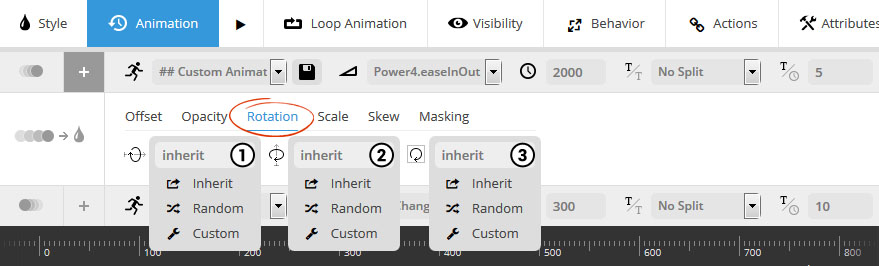
1. Animate 3D rotationX (rotate around x-axis)
2. Animate 3D rotationY (rotate around y-axis)
3. Animate 2D Rotation (circular, non-3D rotation)
Choose “Inherit” to honor the animation’s default setting, “Random” to always randomize the value each time the slide is shown, or “Custom” to enter a special value (a positive or negative number usually between 0-360).
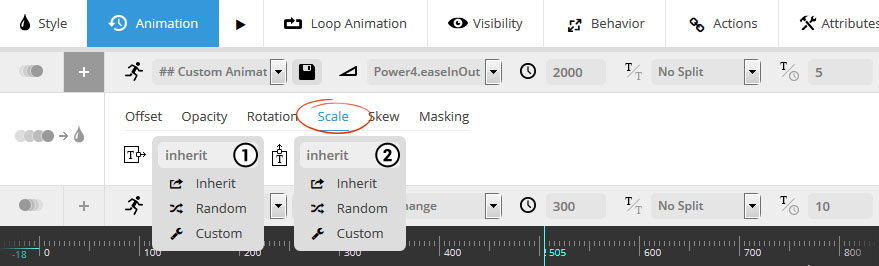
Choose “Inherit” to honor the animation’s default setting, “Random” to always randomize the value each time the slide is shown, or “Custom” to enter a special value (a number between 0-1).
For a traditional “Zoom” type animation, set the “scaleX” and “scaleY” parameters to the same values.
Choose “Inherit” to honor the animation’s default setting, “Random” to always randomize the value each time the slide is shown, or “Custom” to enter a specific amount of pixels to skew the layer by.

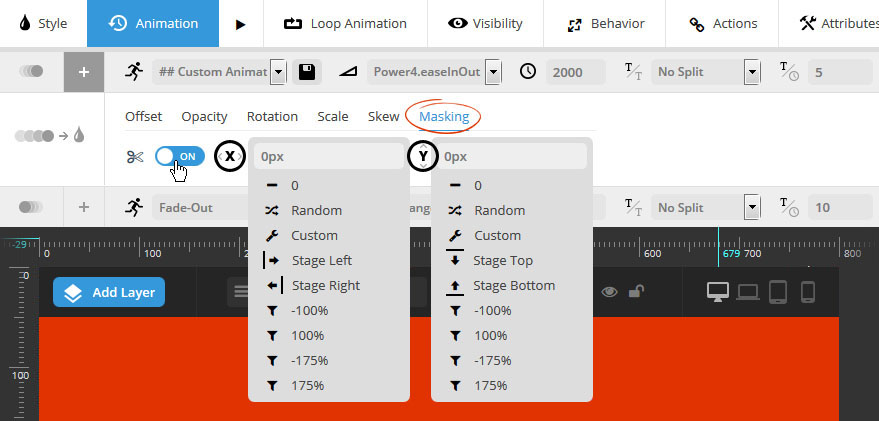
X = Apply a horizontal mask for the animation
Y = Apply a vertical mask for the animation
Apply a mask to the layer, which will result in the animation only becoming visible once the layer is positioned inside the masked area.
For a good understanding of how masking works when applied to animations, click here to see how a generic animation looks with masking applied, and here to see a generic example of the same animation, but without any masking.
1. Blur = Apply a Blur Effect to the Animation.
2. Grayscale = Apply a Grayscale Effect to the Animation.
3. Brightness = Adjust the Brightness of the layer.
The “Blur” effect’s strength will never become higher than “10px”. As for the “Grayscale”, you can adjust it to the range of 0% to 100% and for “Brightness”, you can adjust it to the range of 0% to 150% .

1. Use Font Color Start = Apply starting font color for Text Layers
2. Use BG Color Start = Apply starting background color for Shape Layers
The starting “font color” can only be applied to a Text Layer and the starting “background color” animation can only be applied to a Shape Layer . The visibility of the color will appear in a short duration when the animation starts and can be extended by adjusting the Animation Speed.

When editing your animations, you’ll start of with a predefined animation template, and additional settings adjustments you make will only be applied to the current layer.
However, once you’ve made adjustments for a specific animation, you can save your adjustments as a new “Animation Template” to use for additional layers.
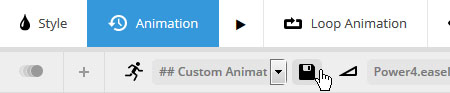
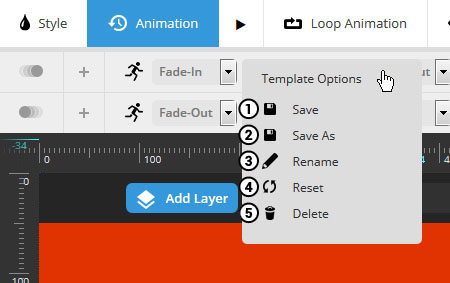
1. Save: Override the current preset animation with your adjusted current settings (original animation template will be permanently modified).
2. Save As: Create a new Animation Template based on the current settings (original predefined Animation Template will not be overridden).
3. Rename: Change the title of the currently selected Animation Template for your own convenience.
4. Reset: Revert currently adjusted settings to the predefined Animation Template’s original settings.
5. Delete: Permanently delete the current predefined Animation Template (can not be undone!).
Apply continuous, animated movement to the layer even after it’s initially animated into view.

1. Loop Animation
Visual Examples: Pendulum | Slide Loop | Pulse | Wave
2. Loop Speed
The amount of time the animation should last before it loops again in seconds. A number between 2-5 usually works best.
3. Loop Easing *
“Easing†is what gives a web animation that “real life†type of movement. For Loop animations, try one of the “easeInOut” options such as “Power1.easeInOut” for a smooth, continuous motion.
* not available for “Wave”, as this animation only works best with a predefined easing.

1-2. Starting/Ending Rotation
Choose the rotation degrees for the start and end of the looped animation. Use a negative number for the “start” value” and a positive number for the “end” value.
3-4. Rotation X/Y point (transform-origin)
Percentage based values that will act as the axis point for where the layer rotates from.
Loop the layer from one point to another. “X” values are the horizontal plane (left to right), and “Y” values are the vertical plane (top to bottom).

Adjust the Zoom Start (#1) and Zoom End (#2) parameters to continuously zoom the layer in and out. A value of “1” equals 100%, so “1.5” would be 150%, etc.


1-2. Rotation X/Y point (transform-origin)
Percentage based values that will act as the axis point for where the layer rotates from.
3. Start Angle
Wave animations rotate on a 360 degree circular loop. The “angle” value here would be the starting position for the animation when this loop begins.
4. Radius of Rotation
Defines a pixel-based orbital area that the layer will animate around.
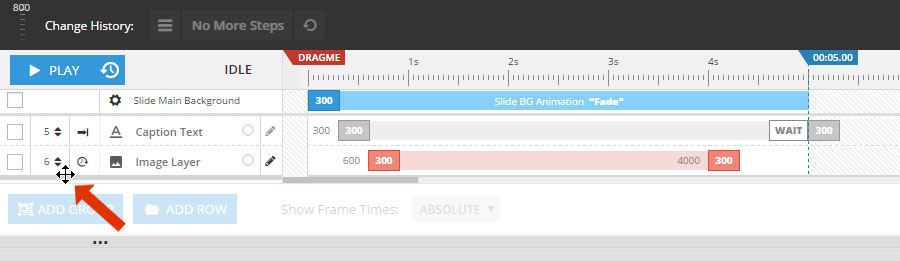
The Layers Timing & Sorting section is a visual representation of the slide’s animation sequence. It’s also where you can adjust the z-index depth for each Layer (i.e. place a Text Layer on top of an Image Layer, etc.).
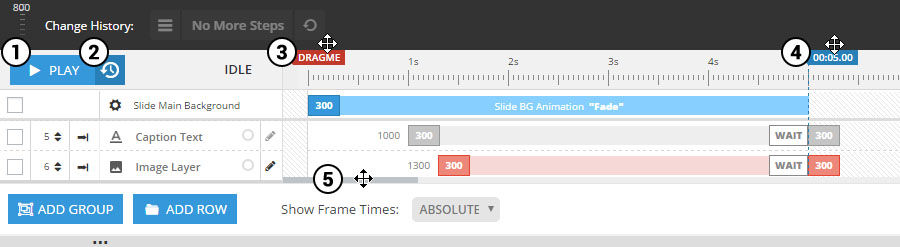
1. Play/preview the current slide’s animation sequence (slider’s main background and layers).
2. Reset the preview timeline so it can be replayed.
3. Drag with your mouse for a slow motion / manual preview experience.
4. Increase/decrease the slide’s main delay.
5. Horizontal scrollbar to help view larger timelines.

1. Represents the Slide’s Main Background that initially animates in when the slide is shown.
2. Example Text Layer
3. Example Image Layer
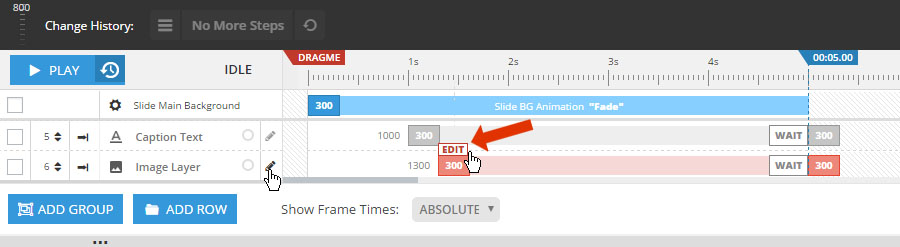
Click “edit” as shown in the screenshot below to enter precise numbers for the Layer’s animation.
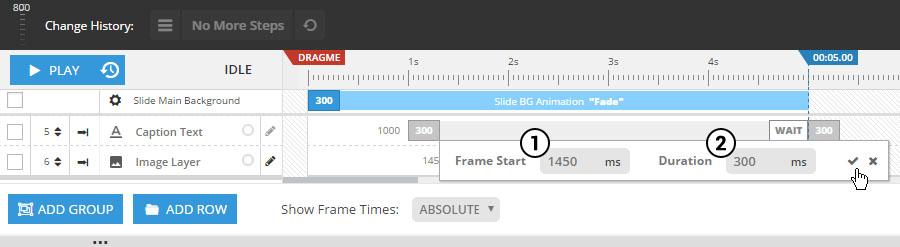
1. Frame Start: The time when the Layer will begin to animate into view.
2. Duration: The total amount of time the animation will last.  Use smaller numbers for fast animations (300-500).  And larger numbers for longer animations (1000-1500).
Or drag the beginning, middle or end of the animation to adjust the start time or duration.

And then decide if the Layer should animate out before (1) the next slide is shown, or if the Layer should always remain visible throughout the life-cycle of the current slide (2).
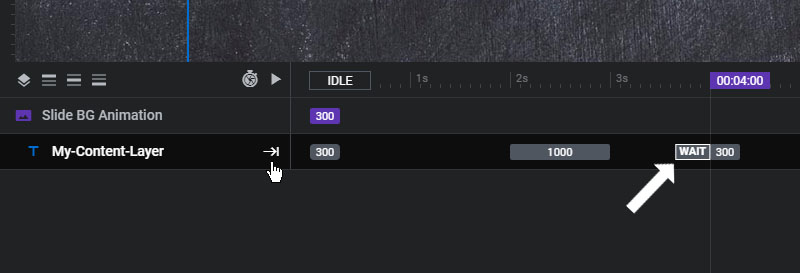
The Layer always remain visible throughout the life-cycle of the current slide.
The Layer will animate out BEFORE the next slide is shown.
Drag the listed Layers with your mouse on top of one another to sort the Layers, setting their z-index/stacking order. Layers that are hyperlinked should always have a higher z-index than other layers (i.e. positioned below other Layers in the list).
Layer Groups, and also Columns and Rows can be animated in addition to the individual Layers they contain to create complex animations.
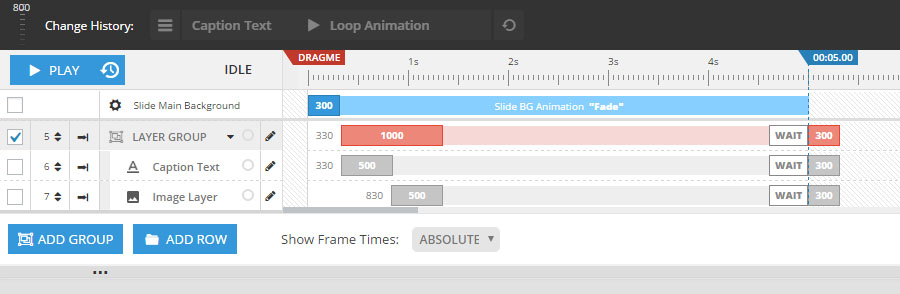
And animating content together inside a Layer Group is also a great way to improve performance.
To do this, create a Layer Group, and then add an animation to the Group:
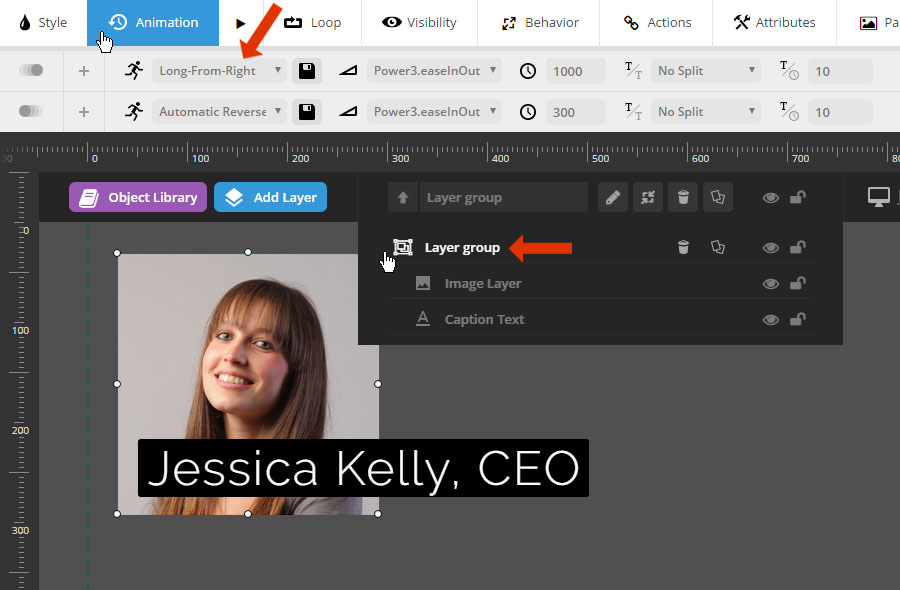
And then set the animation for each individual Layer to “No Animation”.