 Package
Theme package contain following files and folders
- Documentation – documentation in html format
- Theme – theme source code
- preview.zip – magento installation with theme, setup as theme preview
- cartown_uninstall_theme_only.php – uninstall script
- cartown_uninstall_theme_and_extensions.php – uninstall script
Installation
This section descript installation process. There are two types of installation – install theme on existing site or install preview package that contain sample data like our demo.
Pre-Installation Steps
We do recommend to install and test the extension on development server before installing it on live store
Backup
Backup store files and the store database.
- disable Magento cache – Cache Management
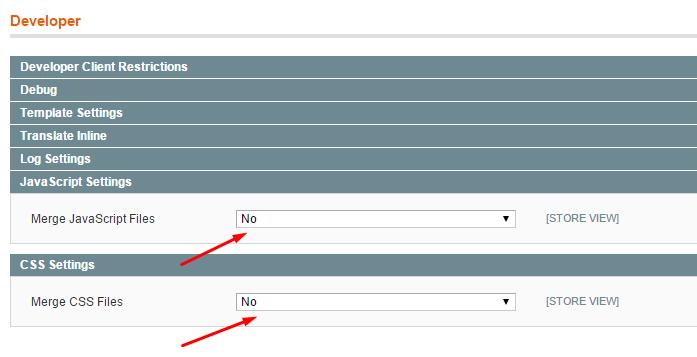
- Disable CSS / JS merge in System > Tools > Delevoper.
- Disable compilation mode in System > Tools > Compilation.
- Log out from admin panel. This step is required to reset magento access control cache.
Preview Installation
Preview installation is for people who want to create magento installation like our demo store.
Do not install preview package on LIVE SITE or EXISTING STORE
It contain complete magento source and will overwrite your original files.
- Extract content of preview.zip
- Create new database using your favorite MYSQL manager ( like phpMyAdmin or HeidiSQL )
- Import database from preview package (preview/cartown.sql)
- Upload content of preview/www/ folder of preview package to your server ( magento root folder )
- Open new window in browser and enter installation URL
- Follow Magento Installation Steps
Theme Installation
- Unzip theme package
- Navigation into
package/Themefolder - Upload content of
package/Themeto your magento root directory.package/Theme/app>>magento_root/apppackage/Theme/js>>magento_root/jspackage/Theme/skin>>magento_root/skin- and so on…
Cartown Theme does not overwrite any magento core files
- Set correct file permissions for all the theme files which you uploaded to your server.
- Login to magento admin panel
- Navigate to NWDthemes> Cartown Theme > First Time Install
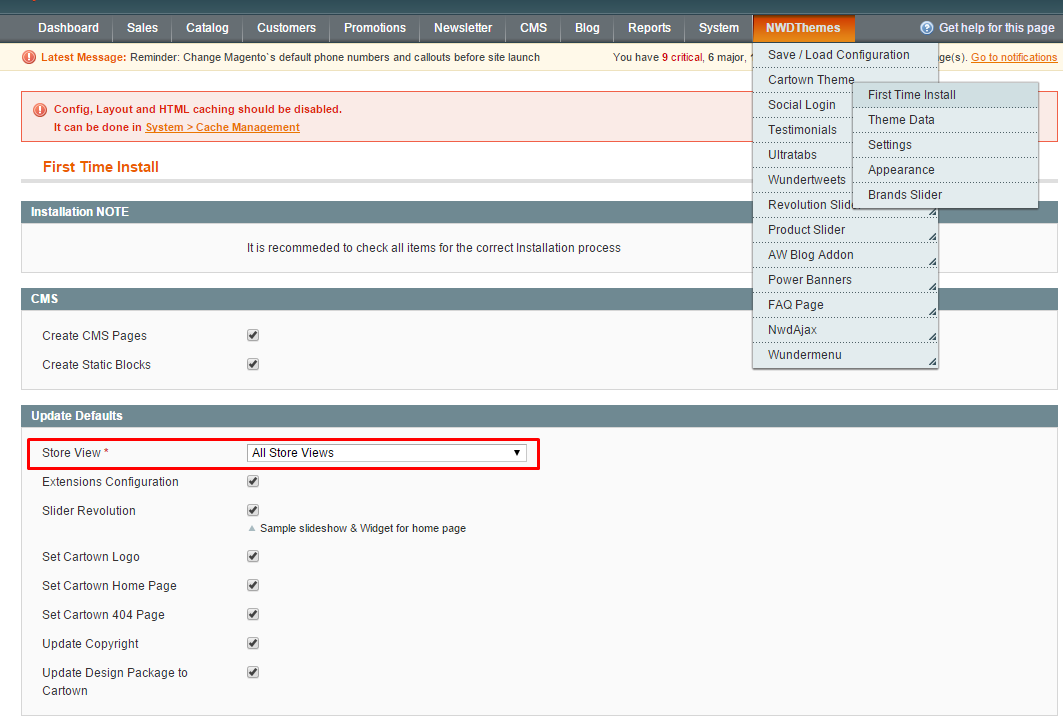
If you have enabled cache – you will see warning and there will be no install button
- Select Store View you wish to install theme to
- Check / Uncheck Install Options
- Press Install button
Common Issues
- No “NWDthemes” item in main menu.
- check that all files were uploaded.
- check that all files have correct permissions.
- check that Magento cache is disabled – Cache Management.
- I get 404 error in System > Configuration > Cartown Theme
- Logout from backend and login back
- My configuration changes do not appear on the store.
- refresh Magento cache – Cache Management
- make sure that settings are not overrided on different scope level like website or store view. Scope switch is located in top left corner of Configuration page. More info about scopes – Understanding store scopes
Uninstallation
Please ensure that you have done following steps before runnning Uninstall
1. Disable Compilation if you are using Compilation Mode. It can be done in System > Tools > Compilation
2. Disable Cache. It can be done in System > Cache Management
You have two options for Uninstallation:
- Uninstall Theme Only
Copy cartown_uninstall_theme_only.php from Theme package to your magento root folder and run it using browser address line. It will do following steps:- remove only theme extensions files
- remove media files
- remove skin files
- clear database
- Uninstall Theme and Extensions
Copy cartown_uninstall_theme_and_extensions.php from Theme package to your magento root folder and run it using browser address line. It will do following steps:- remove all extensions files
- remove media files
- remove skin files
- clear database
POST UNINSTALLATION STEPS:
1. Run Recompile if you are using Compilation Mode. It can be done in System > Tools > Compilation
2. Delete NWDthemes Widgets. It can be done in CMS > Widgets
3. Update Design Package. It was reset to default theme (RWD). It can be done in System > Configuration > Design
4. Update Home Page and 404 page. It was reset to defaults. It can be done in System > Configuration > Web
5. Clear / Enable Cache. It can be done in System > Cache Management
Theme Customization
This section discusses how to start building a custom theme.
A good practice during development on Magento is to disable Magento’s cache. Although doing this adversely impacts performance, it frees you from having to manually clear the cache when you make changes to files or configuration settings that are being cached. Check Magento Configuration > Cache Management.
You should always enable the cache in a production environment.
The correct way to customize the theme in Magento is to create your own sub-theme. You should never edit original design package files. Files that need to be changed can be copied to your custom sub-theme.
Creating a Directory Structure
Lets discuss how to create new top-level directories for your theme and to copy files to those directories.
The top-level directories you’ll need are:
[your Magento install dir]/app/design/frontend/cartown/customtheme
[your Magento install dir]/skin/frontend/cartown/customtheme
To create those directories and to add your theme configuration:
Using a command shell, log in to your Magento host as a user with privileges to write to the web server docroot. (Typically, this is the web server user.)
Enter the following commands in the order shown:
cd [your Magento install dir]
mkdir -p app/design/frontend/cartown/customtheme
mkdir -p skin/frontend/cartown/customtheme
Copying Files For Your Theme
Use the following commands to copy files for your custom theme:
cd [your Magento install dir]
cp -R skin/frontend/cartown/default/images skin/frontend/cartown/customtheme
cp -R skin/frontend/cartown/default/css skin/frontend/cartown/customtheme
Copying the images directory is important because the CSS uses relative image paths
Configuring Magento to Load Your Theme
- Log in to the Magento Admin Panel as an administrator.
- Click System > Configuration > GENERAL > Design.
- In the right pane, click Package to expand it.
- In the Current Package Name field, enter
cartown - In the right pane, expand Themes.
- In the Default field, enter
customtheme.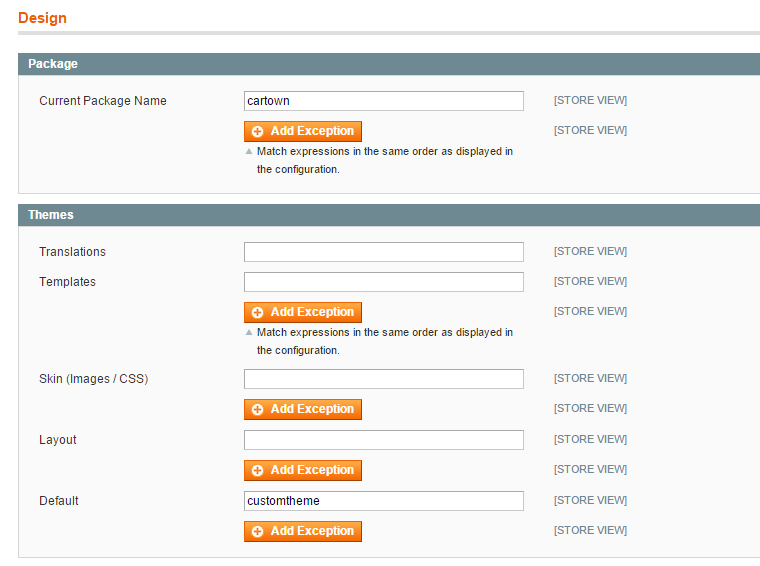
- In the top right corner of the page, click Save Config.
- If prompted, flush the cache. Check Magento Configuration > Cache Management.
Change Logo
- Log in to the Magento Admin Panel as an administrator.
- Click System > Configuration > GENERAL > Design.
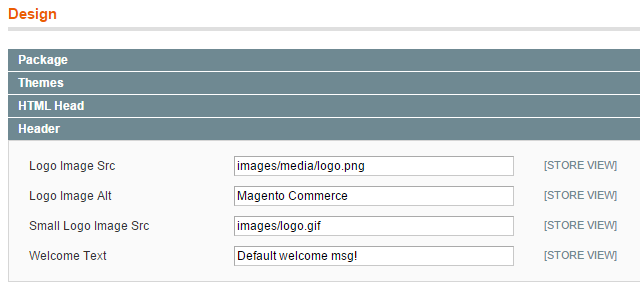
- In the right pane, click Header to expand it.
- In the Logo Image Src field select new logo
- In the Logo Image Alt field enter alternative text.
- In the top right corner of the page, click Save Config.
- If prompted, flush the cache. Check Magento Configuration > Cache Management.
Localization
Translate file is located in app/design/frontend/cartown/default/locale/en_US/translate.csv. Use it to translate custom strings into other languages.
For example you need to translate everything to French. Follow these steps:
- install French translation
- create app/design/frontend/cartown/default/locale/fr_FR/
- copy tranlate.csv to a new local folder
- edit with your favorite text editor
- switch store locale to French in System > Configuration > General
- If prompted, flush the cache. Check Magento Configuration > Cache Management.
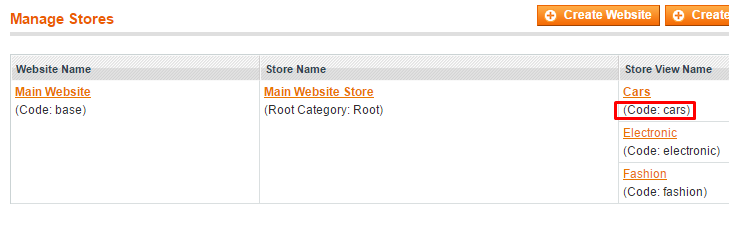
Add Language Flag
If you have several stores, you will see store switcher in the header. It shows store flag and store name.
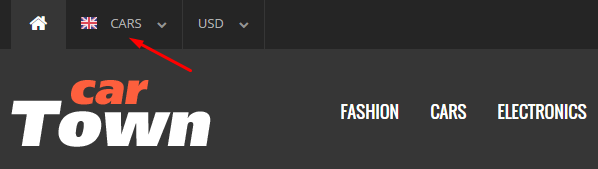
Flag images specification: PNG, 16×12 px.
Flag images location: skin/frontend/cartown/default/images/flags. You should upload new flags into this folder.
Flag image name should be the same as store name.
Store code could be found in System > Manage Stores
Theme Settings
This section discusses Cartown theme settings. We have added a lot of optionsto suit all possible needs. All changes done thru admin panel. There is no need to dig the source code.
To edit theme settings navigate to NWDthemes > Cartown Theme > Settings
Features
- Sticky Header – enable / disable sticky header
- Scroll To Top – enable / disable scroll to top button
- Product slider Skin – select skin for product slider
Home Page
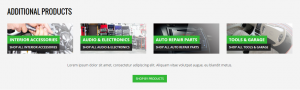
- Additional Products Block – enable / disable additional products block on home page.
Can be seen on Cartown Home Electronics page
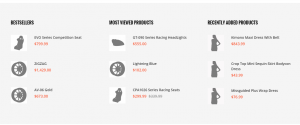
- Bestsellers / Most view product block – enable / disable Bestsellers / Most view product block on home page.
Can be seen on Cartown Home Cars page
Header
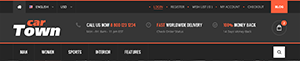
Select Header Style
- Style 1
- Style 2

- Style 3

Footer
- Select Footer Banners Style
- Style 1

- Style 2

- Style 3

- Style 1
- Select Footer Block Style
- Style 1

- Style 2

- Style 3
- Style 1
Product Labels
New Label
- Status – enable / disable label
- Position – Label position
- Text – Label text
Sale Label
- Status – enable / disable label
- Position – Label position
- Text – Label text
Listing
Grid Mode
- Columns – number of columns in grid mode.
Max. number of columns for 3 columns layout is 4.
Product Image
- Image Width – Image width on product listing.
Default width is 270 pixels.
NOTE: Please synchronize with Small image width in System > Configuration > Catalog > Product Image
Product Elements
- Product Name – show / hide product name
- Product Price – show / hide product price
- Product Price on Hover – show / hide product price on hover
- Product Rating – show / hide product rating
- Product Buttons – show / hide product buttons
Additional Images
- Additional Images Slider – enable / disable Additional Images Slider
Product View
Product Image
- Image Width – Image width on product listing.
Default width is 570 pixels. Min width is 262 px. Max width is 700 px. - Zoom Type – Zoom Type
- Easing – zoom window easing
- Mousewheel Zoom – enable / disable Mousewheel Zoom
- Product Thumbnails – number of product thumbnails under main image
Related / Upsell Products
- Related slider Location – slider location ( product tabs / under tabs )
- Related slider Columns – number of visible products
- Upsell slider Location – slider location ( product tabs / under tabs )
- Upsell slider Columns – number of visible products
- Navigation – Display “next” and “prev” buttons.
- Show pagination – show / hide pagination
- Product slider skin – select product slider skin
Reviews
- Number of reviews on product page – Number of reviews on product page
Theme Appearance
This section discusses Cartown theme Appearance. We have added a lot of options to suit all possible needs. All changes done thru admin panel. There is no need to dig the source code.
To edit theme appearance navigate to NWDthemes > Cartown Theme > Appearance
It has following sections:
- General – define main color, main font and buttons background / text color
- Header – header background, borders, top links, language and currency dropdowns
- Navigation – site navigation
- Content – content background, text and links color
- Sidebar – sideblocks font, background and text color
- Checkout Pages – checkout steps appearance
- Product Slider – product slider navigation arrows
- Product Labels – labels colors
- Product Price – price font, color etc.
- Pager Toolbar – product listing toolbar settings
- Ratings – ratings stars colors
- Product View – product details settings
- Additional Products block – additional products block appearance
- Footer Banners – background, font and text color of footer banners
- Footer – background, font and text color of footer text and copyright block
- Custom CSS – here you can add custom CSS
Static blocks & cms pages
HINT
Turn off WYSIWYG editor. WYSIWYG editor can break the content of CMS page / block.
It can be done in System > Configuration > Content Management
This section discusses Cartown theme static blocks & cms pages. We have added a lot of pages and static blocks to suit all possible needs. All changes done thru admin panel. There is no need to dig the source code. You can also enable / disable static blocks to hide unneeded information.
Restore cms pages and static blocks.
You can import / restore cms pages and static blocks by using theme admin functionality. By default all cms blocks imported during Theme Installation ( step 10 )
If you accidentally modify or delete block / page and want to restore original data – you can use Restore cms pages and static blocks functionality. Check data section for detailed instructions.
Retina Images in CMS Blocks
Our theme is Retina Ready. If you want to add retina support for cms image, you need to do following steps:
- Log in to the Magento Admin Panel
- Click on CMS > Static Blocks
- Select static block you want to edit
- If there no image – add image code to block content. As a result you should get image html code like this
<img src="{{media url='nwdthemes/cartown/370x370.jpg' }}" alt=""/> - To add retina image you need to upload the image to the same folder as original image and add following code to image tag
<img data-retina="{{media url='nwdthemes/cartown/740x740.jpg' }}" src="{{media url='nwdthemes/cartown/370x370.jpg' }}" alt=""/>
CMS Pages
Cartown theme comes with 5 CMS pages on board:
- Cartown Home Cars – home page with powerbanners, image banners block and two product sliders
- Cartown Home Electronics – home page with several image banners blocks, cms tabs with product sliders and blog post slider
- Cartown Home Fashion – home page with powerbanners, several image banners blocks, two product sliders and blog post slider
- Cartown No Route – 404 page
- Cartown Typography – typography page
CMS Static Blocks
- Cartown Footer 1
- Cartown Footer 2
- Cartown Footer 3

- Cartwon Footer Banners 1

- Cartwon Footer Banners 2

- Cartwon Footer Banners 3

- Cartown additional products block – located on Cartown Home Electronics page, Controlled in Theme Settings > Home Page
- Cartown Footer Payment Icons

- Cartown Category No Products
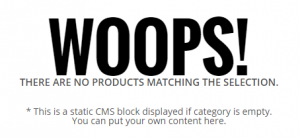
- Cartown Search No Products
- Cartown Cart No Products
- Google Map – located on Contacts page
- Cartown Contacts Working Hours – located on Contacts page
- Contacts – located on Contacts page
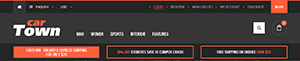
- Cartown Header Style 2 Banners
- Cartown Header Style 3 Banners
- Cartown Promo Banners = located on Cartown Home Cars page
- Cartown Addthis code – located on product details page
MegaMenu
Cartown Theme comes with MegaMenu extension – WunderMenu. It allow you to modify store navigation according to your needs.
There are two main styles:
Default Dropdown
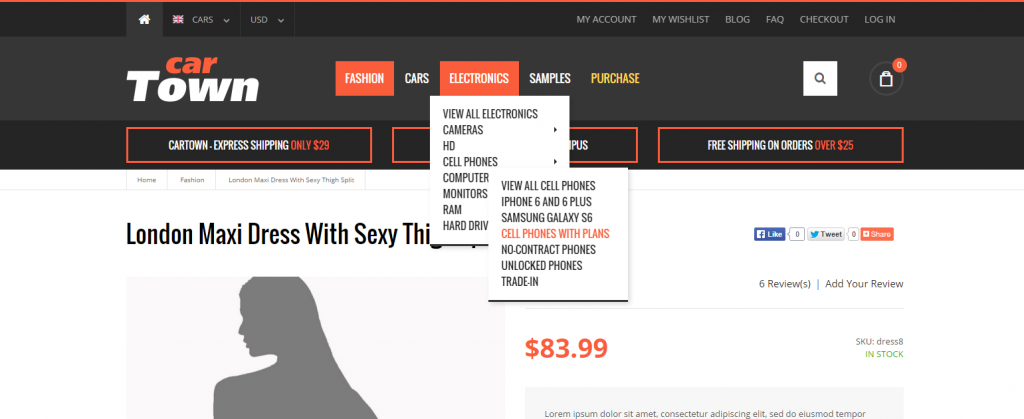
Full-width Dropdown
WunderMenu gives you ability to control dropdown style for each top level category.
- Log in to Magento administrator control panel.
- Go To Catalog > Manage Categoies
- On the left side is a list of categories. Select the category you wish to edit.
- Open WunderMenu section
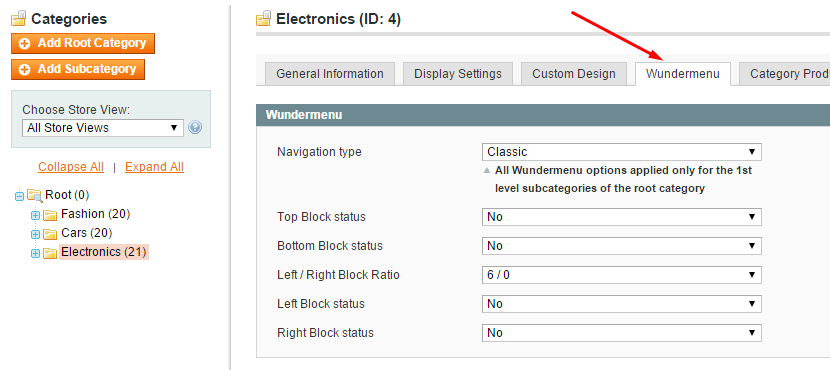
- Edit the Options:
- Navigation type – Classic | Full-width – All Wundermenu options applied only for the 1st level subcategories of the root category
- Block status – Enable / Disable certain block
- Block Content – HTML | Categories List – define block content type
- Block HTML – Block HTML source code ( will be shown if “Block Content” = HTML )
- Left / Right Block Ratio – define blocks ration to each other
Configuration
To edit WunderMenu configuration navigate to NWDthemes > Wundermenu > Configuration
- Enable Wundermenu – Enable / Disable Wundermenu
- Custom items Identifier – Static block indentifier that will be used for custom items html ( will be appended to the end of existing menu)
- Disable Layered Navigation Categories Filter – Enable / Disable Layered Navigation Categories Filter
- Enable Sidebar Block – Enable / Disable Sidebar Categories Block
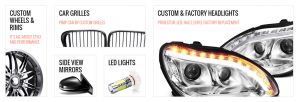
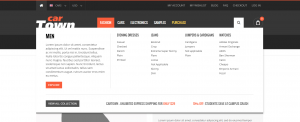
Fashion Category Sample
Fashion Category Sample
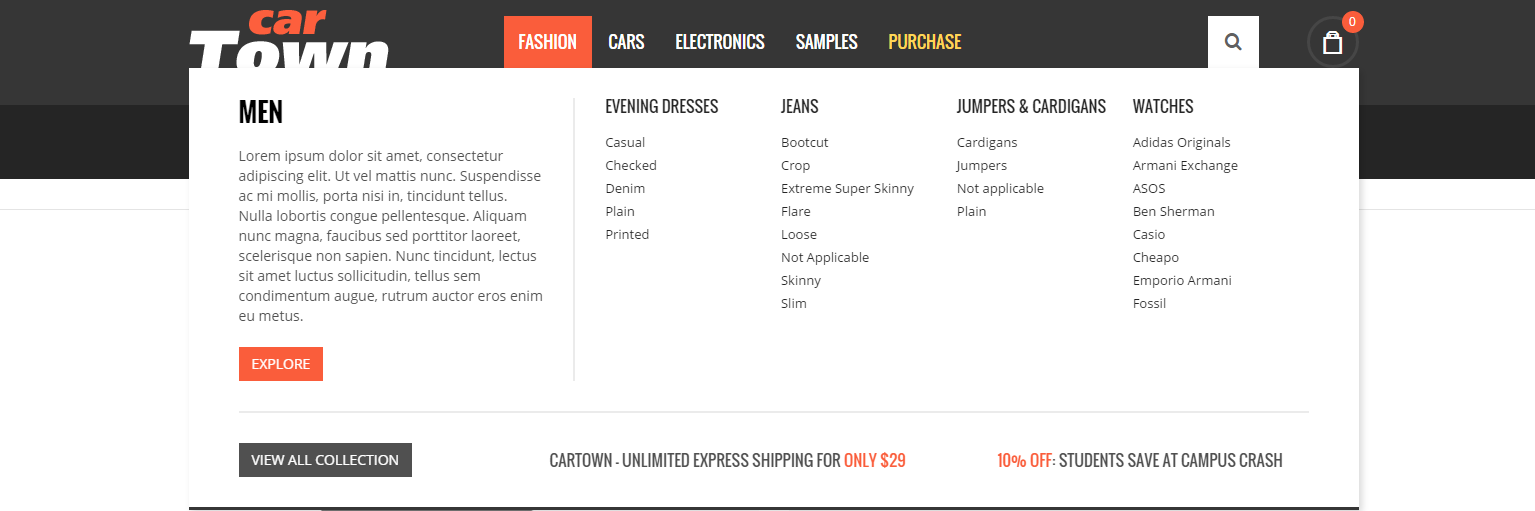
- Navigation type = Full-width
- Top Block status = No
- Bottom Block status = Yes
- Bottom Block Content = HTML
- Bottom Block HTML
<div class="border-top p30-top">
	<div class="row">
		<div class="col-md-3"><a class="button secondary-button" href="#">VIEW ALL COLLECTION</a></div>
		<div class="col-md-5 a-center promotitle"><span class="v-middle">CARTOWN - UNLIMITED EXPRESS SHIPPING FOR <span class="cartown-main-color">ONLY $29</span></span></div>
		<div class="col-md-4 a-center promotitle"><span class="v-middle"><span class="cartown-main-color">10% OFF</span>: STUDENTS SAVE AT CAMPUS CRASH</span></div>
	</div>
</div>
- Left / Right Block Ratio = 2/4
- Left Block status = Yes
- Left Block Content = HTML
- Left Block HTML
<div class="border-right p30-right">
	<h3>MEN</h3>
	<p>Lorem ipsum dolor sit amet, consectetur adipiscing elit. Ut vel mattis nunc. Suspendisse ac mi mollis, porta nisi in, tincidunt tellus. Nulla lobortis congue pellentesque. Aliquam nunc magna, faucibus sed porttitor laoreet, scelerisque non sapien. Nunc tincidunt, lectus sit amet luctus sollicitudin, tellus sem condimentum augue, rutrum auctor eros enim eu metus.</p>
	<a class="button" href="#">Explore</a>
</div>
- Right Block status = Yes
- Right Block Content = Categories
- Right Block HTML = empty
Cars Category Sample
Cars Category Sample
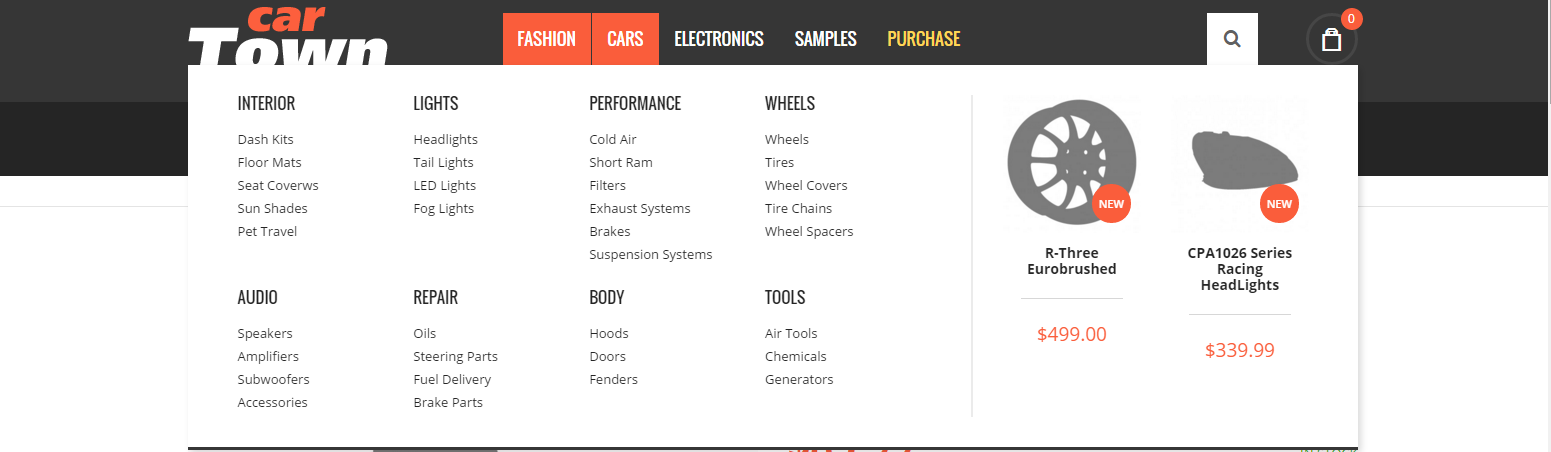
- Navigation type = Full-width
- Top Block status = No
- Bottom Block status = No
- Left / Right Block Ratio = 4 / 2
- Left Block status = Yes
- Left Block Content = Categories
- Left Block HTML = empty
- Right Block status = Yes
- Right Block Content = HTML
- Right Block HTML
<div class="border-left p30-left">{{widget type="productslider/product_widget_slider" display_type="new_products" category_id="3" count="8" show_title="false" columns="2" slider_navigation="true" slider_pagination="false" }}</div>
Wundermenu Custom Items Sample
WunderMenu gives you ability to add your own items to navigation. To add it you need to fill Custom items Identifier option in NWDthemes > Wundermenu > Configuration. This option define Static block indentifier that will be used for custom items html ( will be appended to the end of existing menu).
Sample HTML
<li class="level0 level-top dropdown-classic dropdown-categories parent">
	<a href="javascript:void(0)" class="level0 has-children">Samples<span class="caret"></span></a>
	<div class="wundermenu-wrapper wundermenu-classic dropdown-menu" >
		<ul class="level0 navigation-submenu">
			<li class="level1"><a href="{{store url='blog'}}" class="level1 ">Blog</a></li>
			<li class="level1 dropdown-classic dropdown-categories parent">
				<a href="{{store url='faqpage'}}" class="level1 has-children ">FAQ Page<span class="caret"></span></a>
				<div class="wundermenu-wrapper wundermenu-classic dropdown-menu" >
					<ul class="level2 navigation-submenu">
						<li class="level2"><a href="{{store url='faqpage' _query='___store=cars'}}" class="level2 ">List View</a></li>
						<li class="level2"><a href="{{store url='faqpage' _query='___store=electronic'}}" class="level2 ">Collapsible View</a></li>
					</ul>
				</div>
			</li>
			<li class="level1"><a href="{{store url='typography'}}" class="level1 ">Typography</a></li>
		</ul>
	</div>
</li>
<li class="level0 level-top"><a href="{{store url='contacts'}}" class="level1 ">Contact Us</a></li>
Brands Slider

Brand slider gives you ability to show all store brands or only brands that has products. Brand images located in media/wysiwyg/cartown/brands/.
To configure Brands slider go to NWDthemes > Cartown Theme > Brands Slider.
Configuration
General
- Enable Brands Slider – Enable / Disable Brands Slider
- Show on – Show slider on all pages or home page only
Brands
- Slider mode – show all brands or only brands with products
- Brand Attribute – ID of the attribute for brands list. Catalog > Attributes > Manage Attributes
- Brand Image Extension – Brand Image Extension
- Enable Retina Images – Enable / Disable Retina Images for brands. Retina image should be located in the same folder with _x2 ending.
original = brand.png
retina = brand_x2.png
Slider
- Slider skin – select slider skin
- Autoscroll – Change to any integer ( for example 5000 to play every 5 seconds). Set to 0 to disable autoscroll
- Items to scroll – scroll per item or scroll per page
- Slide to first item – Slide to first item or stop at last item
- Slide speed – Slide speed in milliseconds
- stopOnHover – Stop autoplay on mouse hover
Blog
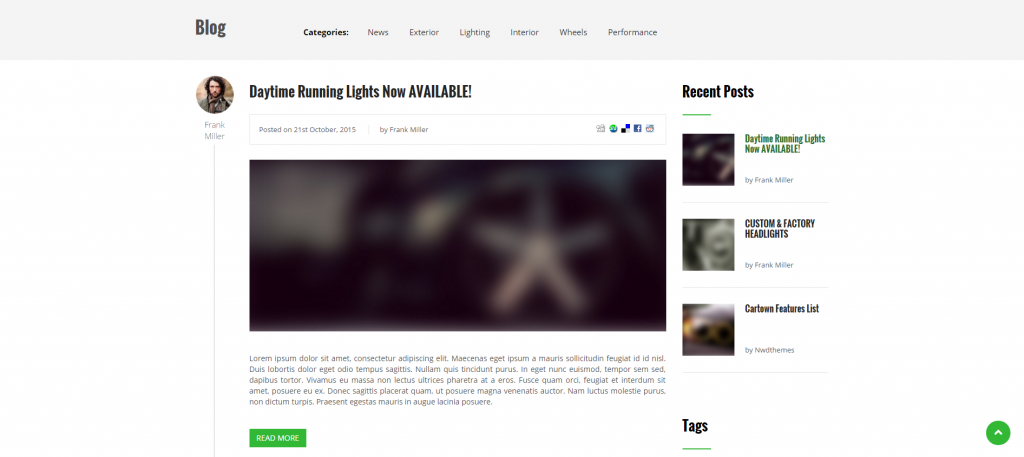
We have added support for aHeadWorks Blog Extension. Check this tutorial for detailed steps on How to Install Magento Connect Extensions.
By default aHeadWorks Blog does not support post images and author images. We have added separate extension to add this functionality. It is located in NWDthemes > AW Blog Addon and has 3 items:
Blog Post Images
This section gives you ability to connect an image to blog post.
- Blog Post – Select blog post to add image to
- Image – select image
- Retina Image – Retina screen image. Should be twice as large as original image
Blog Author Images
This section gives you ability to connect an image to blog author.
- Author Name – Enter Author Name
- Image – select image
- Retina Image – Retina screen image. Should be twice as large as original image
Blog Addon Configuration
General
- Post Author Thumb width – Post Author Thumb width
- Post Author Thumb height – Post Author Thumb height
- Post Image width – Post Image width
- Post Image height – Post Image height
- Post Date Format – Check PHP date function for more information
- Comment Date Format – Check PHP date function for more information
Widget Slider Settings
- Image width – Image width
- Image height – Image height
- Number of visible posts – Number of visible posts
- Number of post symbols – Number of post symbols
- Autoscroll – Change to any integer ( for example 5000 to play every 5 seconds). Set to 0 to disable autoscroll
- Items to scroll – slide per item or per page
- Slide to first item – Slide to first item or stop at last item
- Slide speed – Slide speed in milliseconds
- stopOnHover – Stop autoplay on mouse hover
- Navigation – Display “next” and “prev” buttons.
- Show pagination – Show / hide pagination
NWDthemes Extensions
Cartown Theme comes with a lot of NWDthemes Extensions.
Magento Configuration
We do not provide support of magento core features. Check Help & Support > Useful links section. It contain links to server requirements, installation guide, FAQ, forums, video guides and much more…
Cache Management
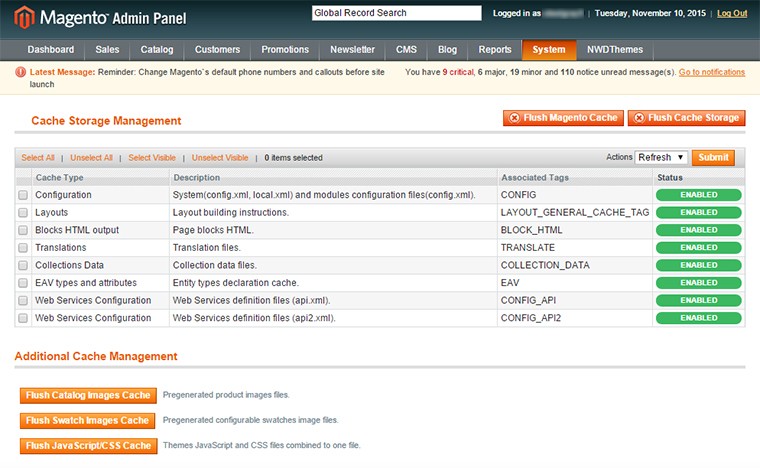
When making certain changes to Magento, such as modifying code files, it is necessary to clear the cache in order for the changes to become visible.
There are two ways to clear the cache in Magento:
Through the Magento Admin Panel
- Log in to your Admin Panel account
- Go to the System -> Cache Management section
- Click on the Flush Magento Cache button
Using SSH/FTP or the cPanel File Manager
Delete the contents of the var/cache/ folder using the following SSH command (MUST be executed from your Magento base directory):
rm -rf var/cache/*
OR
Delete the folder var/cache/ through your FTP client or using the cPanel File Manager.
Index Management
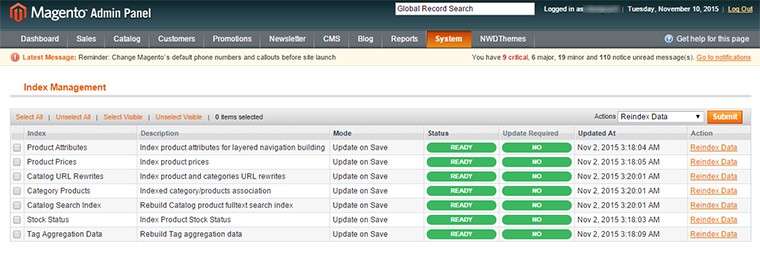
- Log in to Magento administrator control panel.
- Go To System > Index Management.
- On the left side is a list of categories that can be reindexed. Select the categories to reindex. If you want to run a reindex for all of the products, click “Select All”.
- From the Actions drop-down menu, select Reindex Data and then click Submit.
- Depending on how many categories, and the amount of information that needs to be reindexed, this could take a few minutes, or hours.
Color Swatches
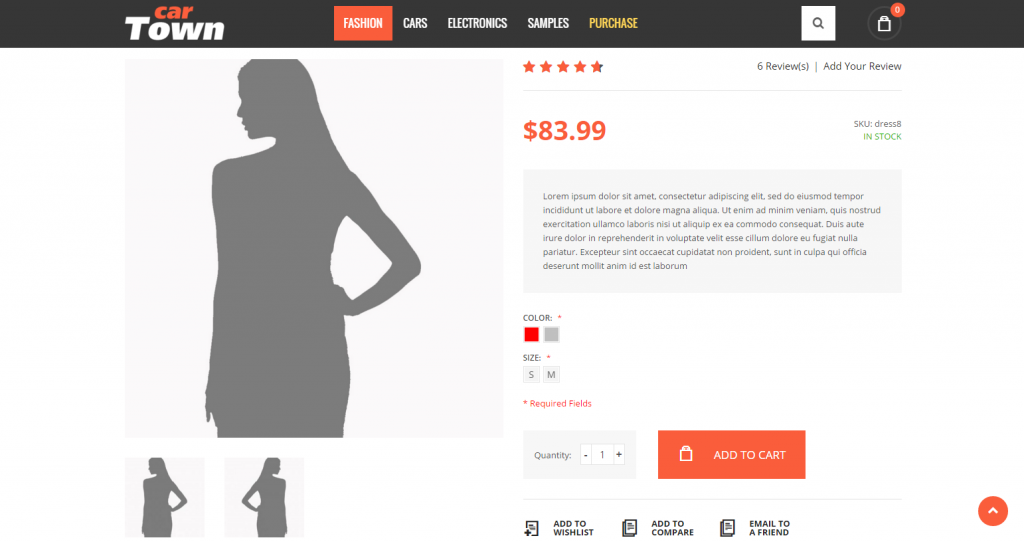
Magento 1.9.1 comes with built-in support of Color Swatches.
Swatches provide an alternate way to display the selection of options for configurable products. Rather than choosing an option from a drop-down list, customers can make their selection by clicking a swatch. Configurable swatches can be used on the product page, product list, and in layered navigation.
Check Magento Documentation for complete Swatches Guide
Disable WYSiWYG editor
Magento WYSIWYG Editor is known to break up advanced HTML. To disable it please do following:
- Log in to Magento administrator control panel.
- Go To System > Configuration > Content Management.
- Set Enable WYSIWYG Editor = “Disabled Completely”.
- Click on Save Config (button located in top right corner) .
Help & Support
We provide premium support for all our customers.
Presale & Suggestions
Please use the item comments sections to ask questions about a product or suggest new features
Stay Up to Date
We provide updates to fix bugs, add new features and ensure compatibility with new wordpress versions
Solving Product Issues
Please use our dedicated support channels for problems with a specific feature of an item or reporting a bug
3rd-party Extensions
We do not support 3rd-party extensions. Our theme isn’t compatible with all third-party extensions by default. Some extensions require customization to make it work properly with the theme. It’s impossible for theme author to make the theme compatible with all existing extensions. Only default Magento theme is compatible with all third-party extensions, because all extensions are designed to work with default Magento theme.
Useful links
Magento Installation
- Magento FAQ: http://www.magentocommerce.com/product/faq
- System Requirements: http://www.magentocommerce.com/system-requirements/
- Server Compatibility Check: http://www.magentocommerce.com/knowledge-base/entry/how-do-i-know-if-my-server-is-compatible-with-magento
- Installation Guide: http://www.magentocommerce.com/knowledge-base/entry/magento-installation-guide
Magento Configuration
- Video Tutorials – Magento Go http://go.magento.com/video-tutorials
- Magento Wiki http://www.magentocommerce.com/wiki/
- Magento Forum http://www.magentocommerce.com/boards/
- stackoverflow.com http://stackoverflow.com/questions/tagged/magento
- Magento Answers Stack Exchange http://magento.stackexchange.com/
Support Policy
Support hours: 10AM – 6PM GMT+1 time, Monday – Friday. The support response time is 24-48 hours.
Support for our items includes:
- Fixing bugs and reported issues
- Responding to problems regarding the item and its features
- Providing updates to ensure compatibility with new software versions
Item support does not include:
- Customization and installation services
- Support for third party software and plug-ins
- Support for Magento: configuration, installation, maintenance etc.