Email Templates Manual
In this document, you will find step by step instructions for installing and using this extension. Thank you for paying attention to this manual. If you have more questions please post your question on themeforest item page and our staff will put its best to help you http://themeforest.net/
Features
Easily change design and customize all Magento 2 Email Templates. No source files editing or programming skills required. All email configurations are gathered in single page and handy to access. Replace all emails design globally at once and customize specific emails at your will. Generated emails are responsive and email applications friendly. Increase your sales and improve your marketing campaigns with eye catching email design.
Full features list
- Change email template design globally
- Change design of specific email templates
- Change design of newsletter email templates
- Library of email template blocks designs
- Visual email template editor with drag and drop and HTML code edit features
- Email template preview
- Send template preview to email
- All Magento email templates configs on one page
- Add and edit email templates
- Compatible with all modern browsers
- Email clients friendly
- Responsive emails design
- New designs updates
Quick Start
Configure Email Template for Magento Emails
- Install Email Templates Extension
- Create new or edit existing email template
-
Assign it in configs to be used globally or to be used for specific emails
- Use an appropriate email feature to receive email with applied email template design
Configure Email Template for Magento Newsletters
- Install Email Templates Extension
- Create new or edit existing email template
-
Assign it in configs to be used for newsletter emails
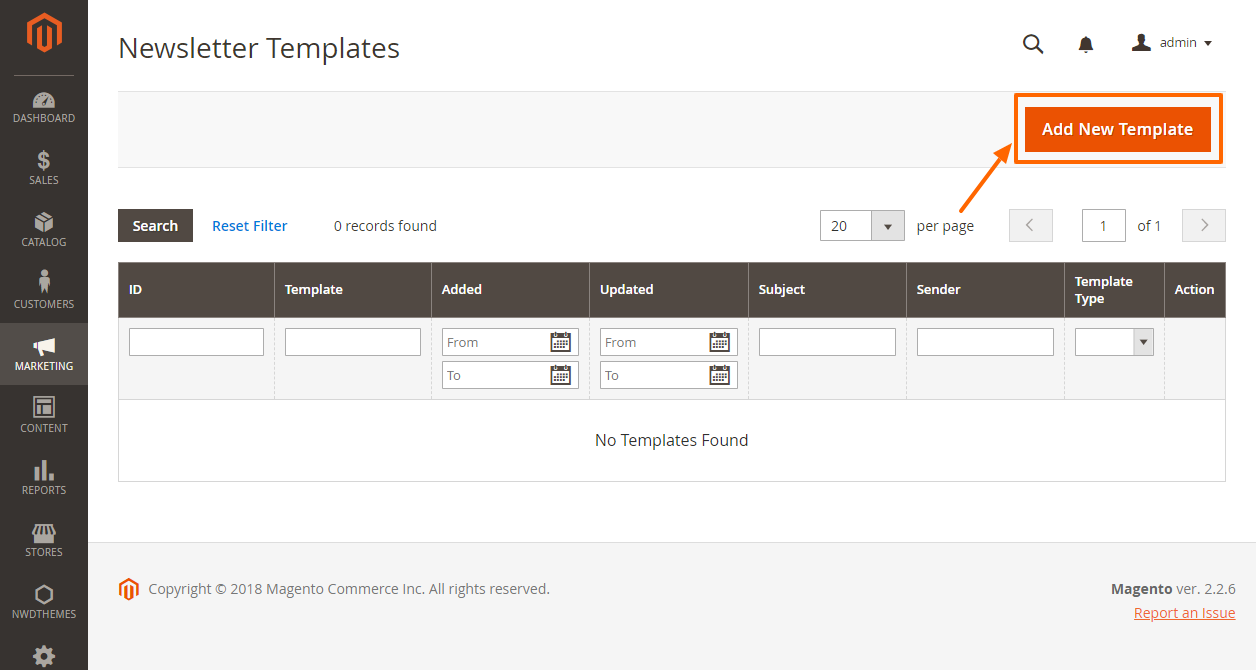
-
Go to Marketing Newsletter Templates and create a new template
-
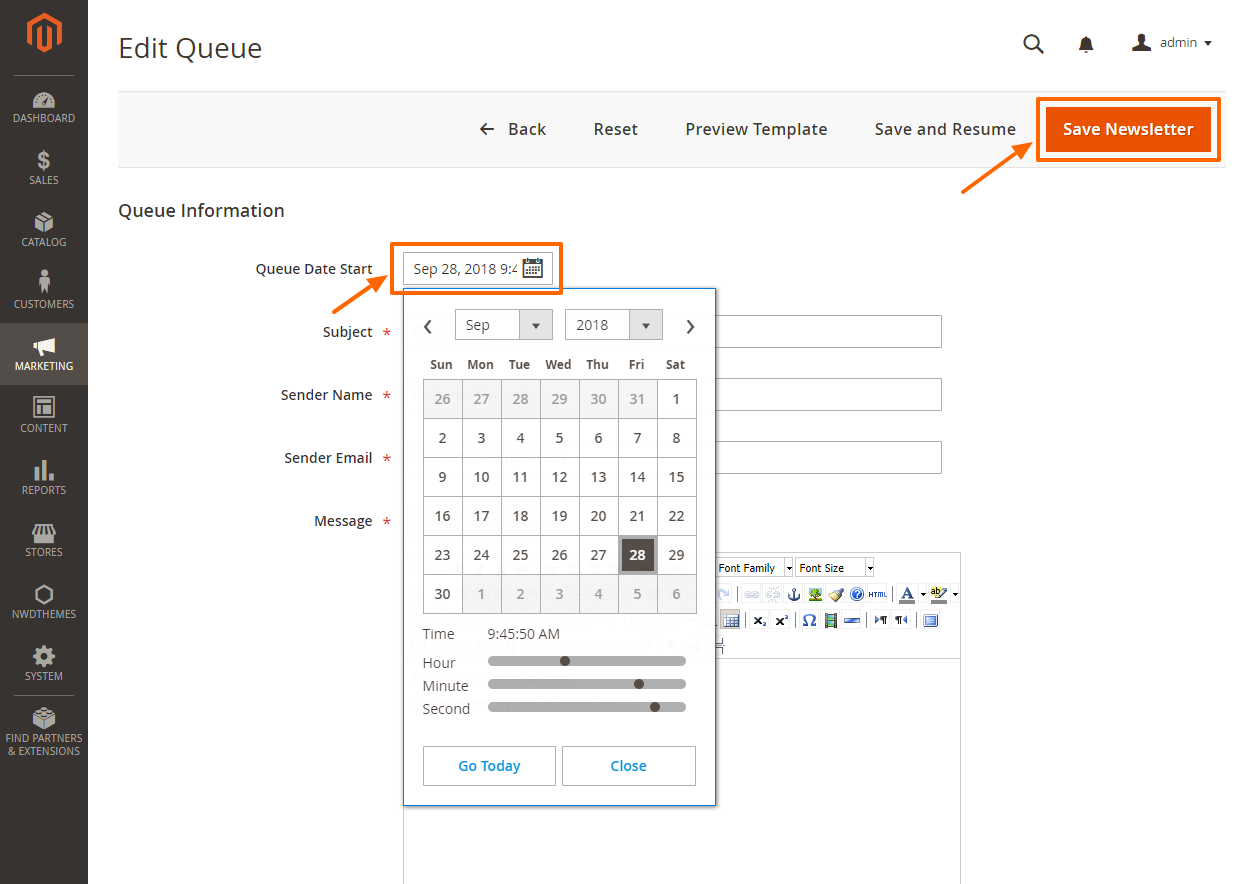
In Marketing Newsletter Templates list select Queue Newsletter action on your template
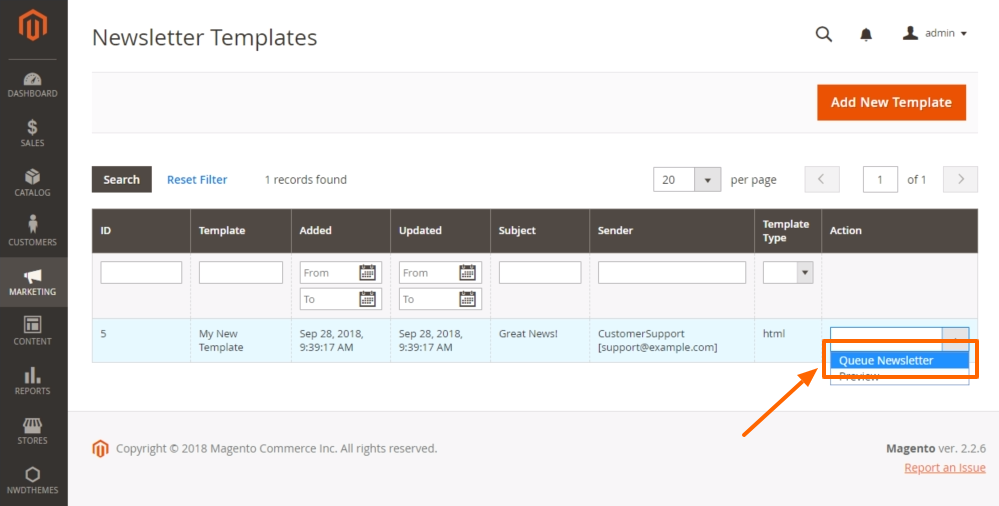
-
Schedule your newsletter template to be sent on desired date
Package
Extension package contain following files and folders
- Documentation - documentation in html format
- Extension - extension source code
Installation
We do recommend to install and test the extension on development server before installing it on live store
Extension upgrade
To upgrade the extension to the latest version, follow the same procedure as for initial installation (which is described in the next chapter). Always test the upgrade on a copy of your Magento before you upgrade your live store. Never go live with the upgrade without testing.
Before start
Important
It is highly recommended to install the theme on a test server before you install it on your live storeBackup
Backup store files and the store database.- Disable the following options: Merge CSS Files, Enable Javascript Bundling, Merge JavaScript Files and Minify JavaScript Files under Stores > Configuration > Developer.
- disable Magento cache - Cache Management
- Enable Magento maintenance mode. To enable the maintenance mode you can create an empty file named .maintenance.flag in your Magento's var directory. Magento will be offline after that. You will need to disable the maintenance mode after installation by removing this file.
Refer to Magento documentation for more details:
Enable or disable maintenance mode - Log out from magento admin panel ( if you logged in ).
Install
- Unzip extension package
- Navigation into
package/Extensionfolder - Upload content of
package/Extensionto your magento root directory.package/Extension/app>>magento_root/app
EmailTemplates does not overwrite any magento core files
- Set correct file permissions for all the files which you uploaded to your server.
Refer to Magento documentation for more details:
Ownership and permissions - Enable module:
php bin/magento module:enable Nwdthemes_Base Nwdthemes_EmailTemplates - Run setup upgrade scripts:
php bin/magento setup:upgrade - Generating static files:
Magento <= 2.1.x
Magento >= 2.2.x - add -f parameterphp bin/magento setup:static-content:deployphp bin/magento setup:static-content:deploy -f - Flush cache:
php bin/magento cache:flush -
EmailTemplates is now installed on your Magento system.
Common Issues
Site is down- Following steps will help you to disable the extension
php bin/magento module:disable Nwdthemes_EmailTemplates php bin/magento cache:flush php bin/magento cache:clean - If you have other cache services such as Redis, Varnish, please also flush cache of those services.
- Deploy your store if needed.
Uninstallation
Check this article for a common actions list: Magento 2: Uninstall Module
- remove the folder app/code/Nwdthemes/EmailTemplates
- drop module tables from database
DROP TABLE IF EXISTS `nwdthemes_emailtemplates_path`; DROP TABLE IF EXISTS `nwdthemes_emailtemplates_element`; DROP TABLE IF EXISTS `nwdthemes_emailtemplates_template`; - remove the config settings
DELETE FROM core_config_data WHERE path LIKE 'nwdemailtemplates%' OR value LIKE 'nwdthemes_emailtemplates_%' - remove the module from database table setup_module
DELETE FROM setup_module WHERE module='Nwdthemes_EmailTemplates' - remove the module from app/etc/config.php
- flush cache
php bin/magento cache:flush - recompile code if you are in production mode
php bin/magento setup:di:compile
Configuring Email Templates
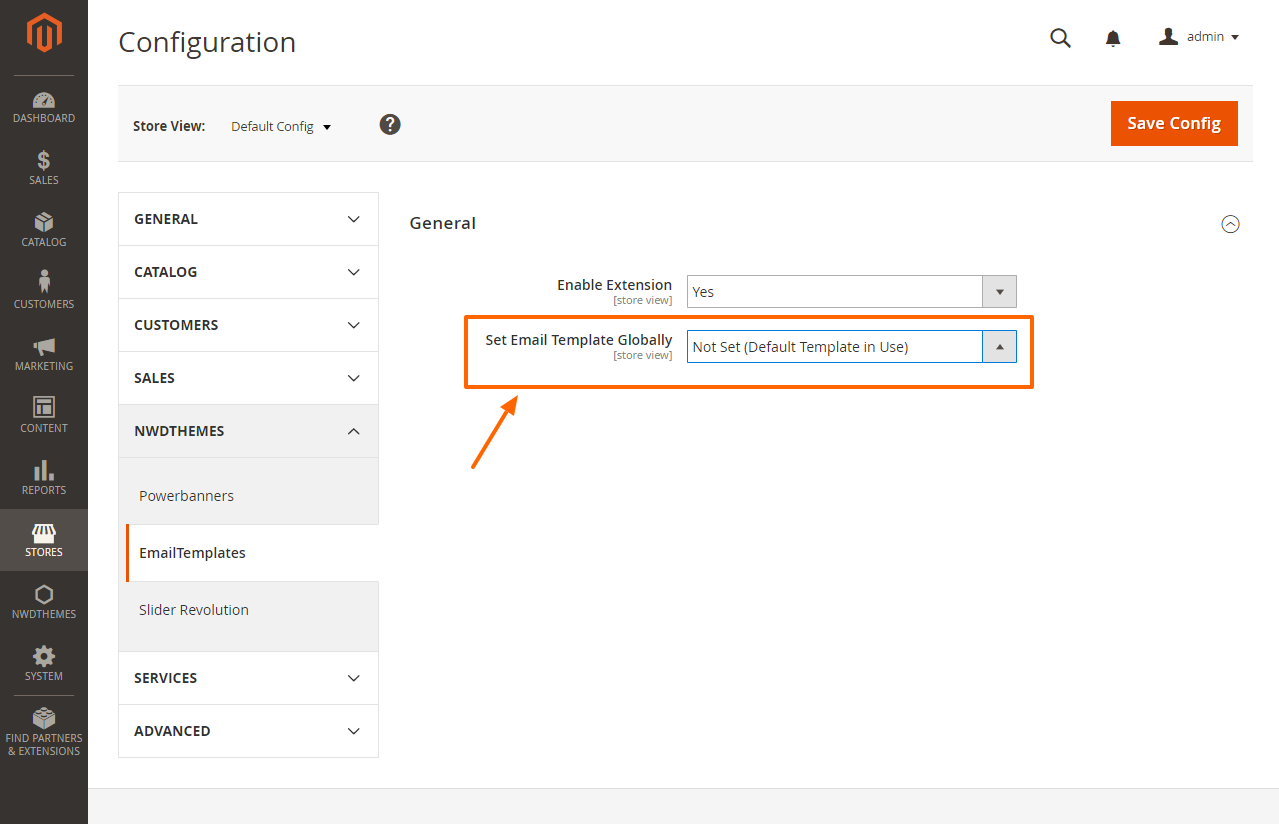
Setting Email Template Globally
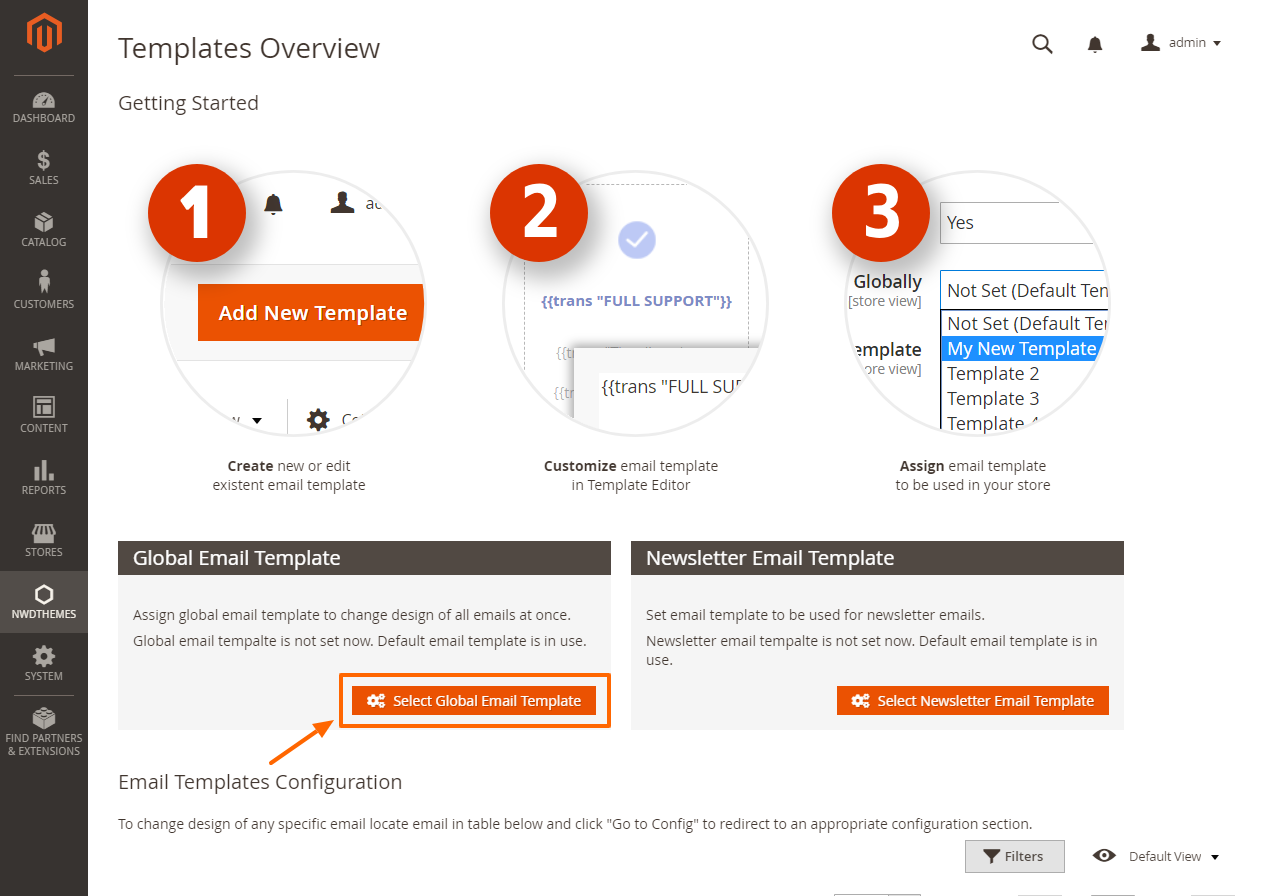
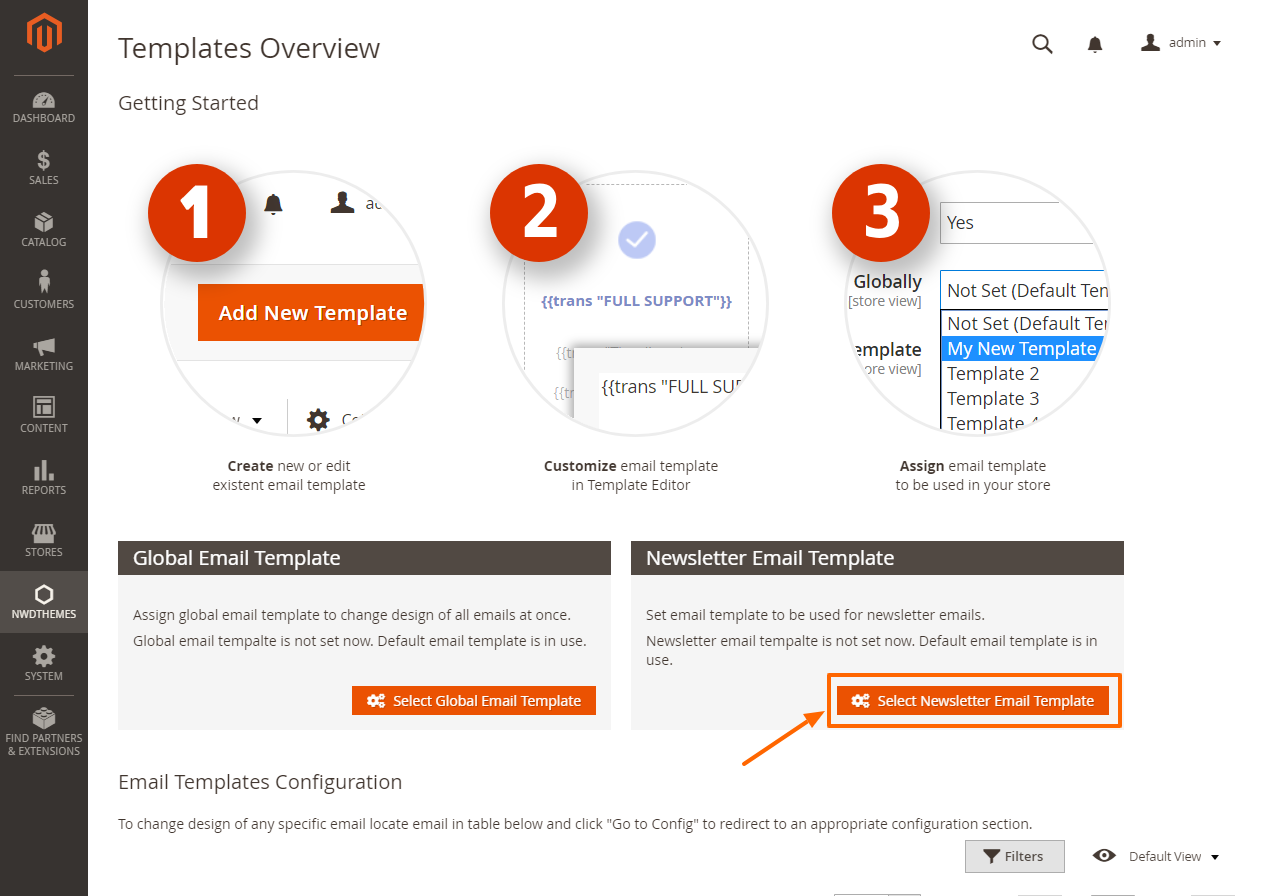
You can set email template globally from the Configuration page. You can reach there from navigation menu or by clicking Select Global Email Template or Change Template link in Templates Overview page
In the Configuration page use Set Email Template Globally dropdown to select which template you want to set globally.
By default content of original email templates will be inserted right before footer of your email template. If you want it to be injected in other location just add {{original_code}} placeholder text to appropriate area of your email template.
Configuring Email Template For Specific Email
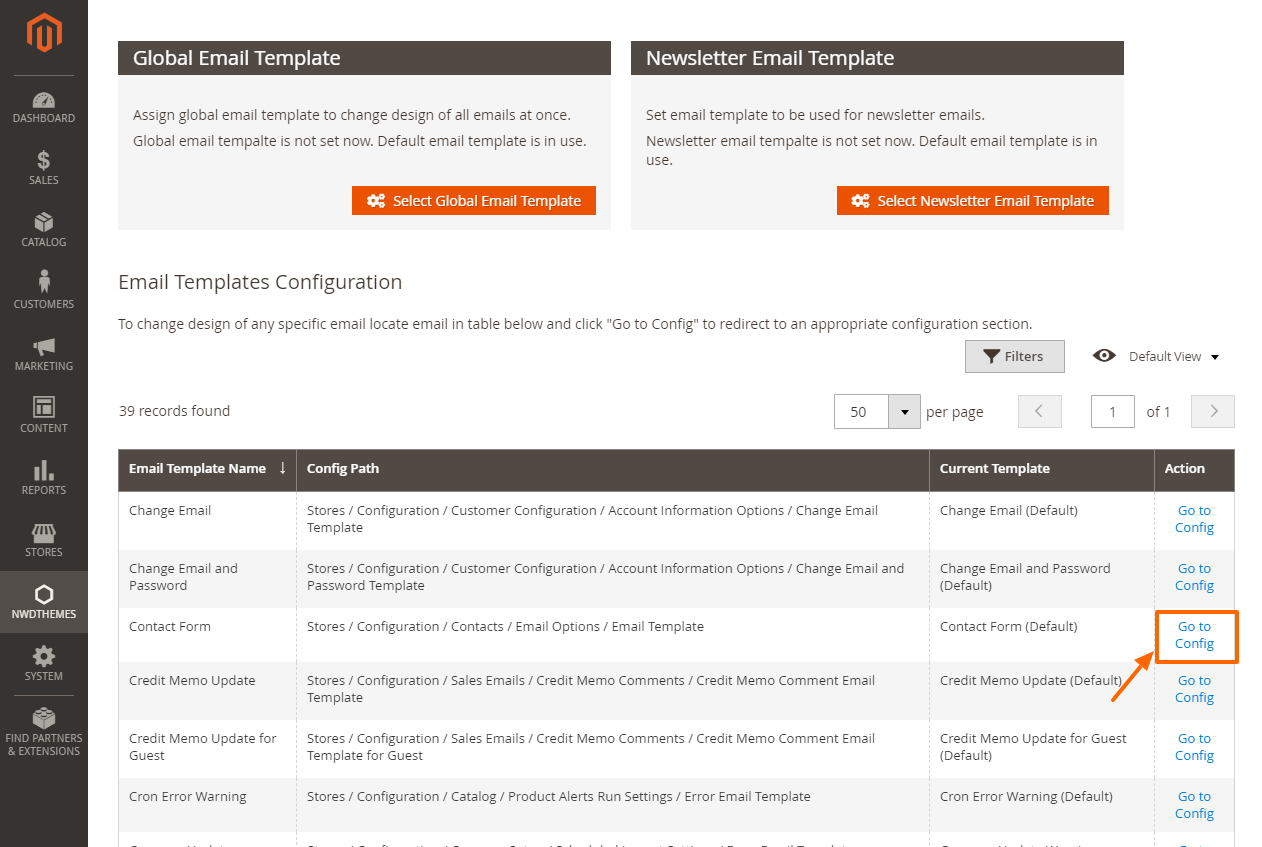
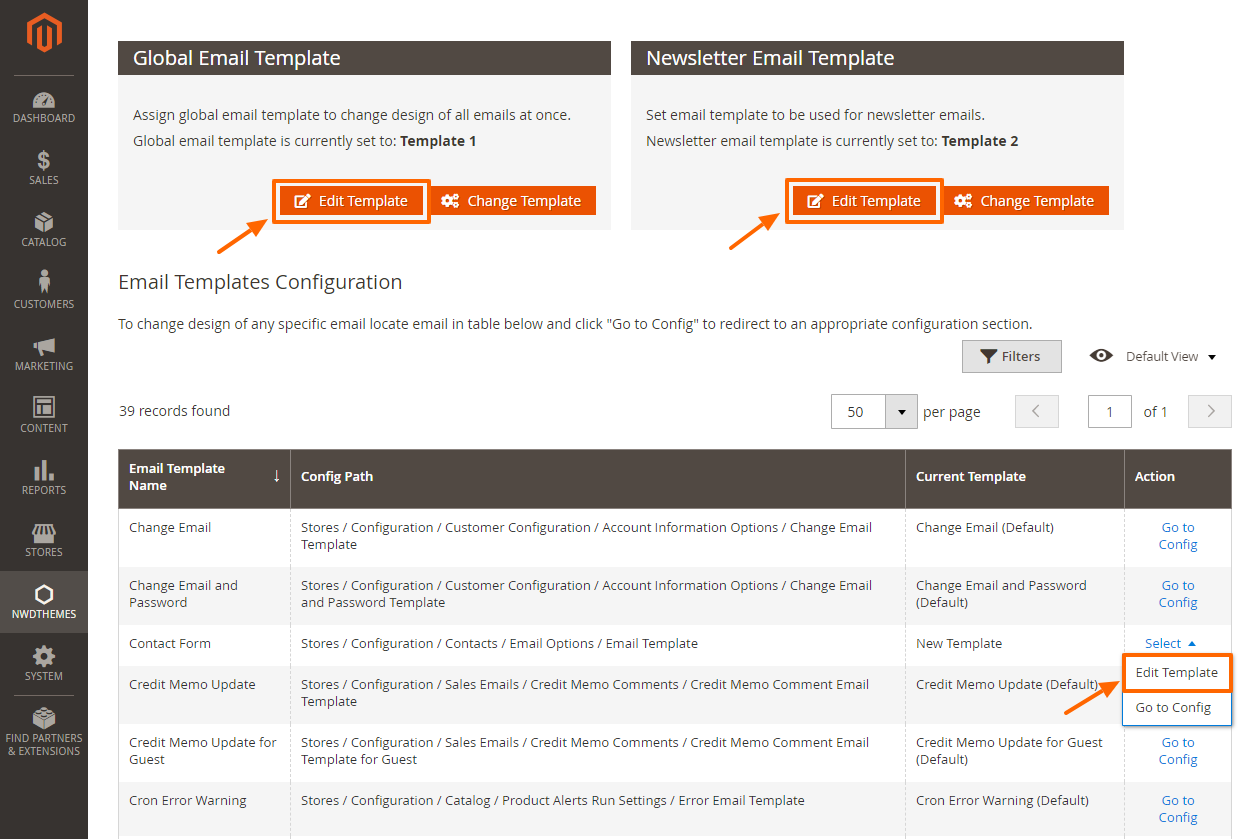
Links to all Magento email templates configuration are gathered on Templates Overview page in Email Templates Configuration table.
Email Template Name column shows the name of related email. Current Template column shows current template used for this email - it could be default system email, email template from Marketing section or custom email template that you can create and edit with our application.
Config Path column contains path to an appropriate configuration that you can use to browse manually through Magento configuration. But it is more convenient to use Go to Config link in the Actions column. It will bring you directly to configuration section where this email could be set.
Clicking Go to Config link will navigate to appropriate configuration section where you can choose from list of templates including those created in this application to replace the design of specific email. In current example it is Contact Us email.
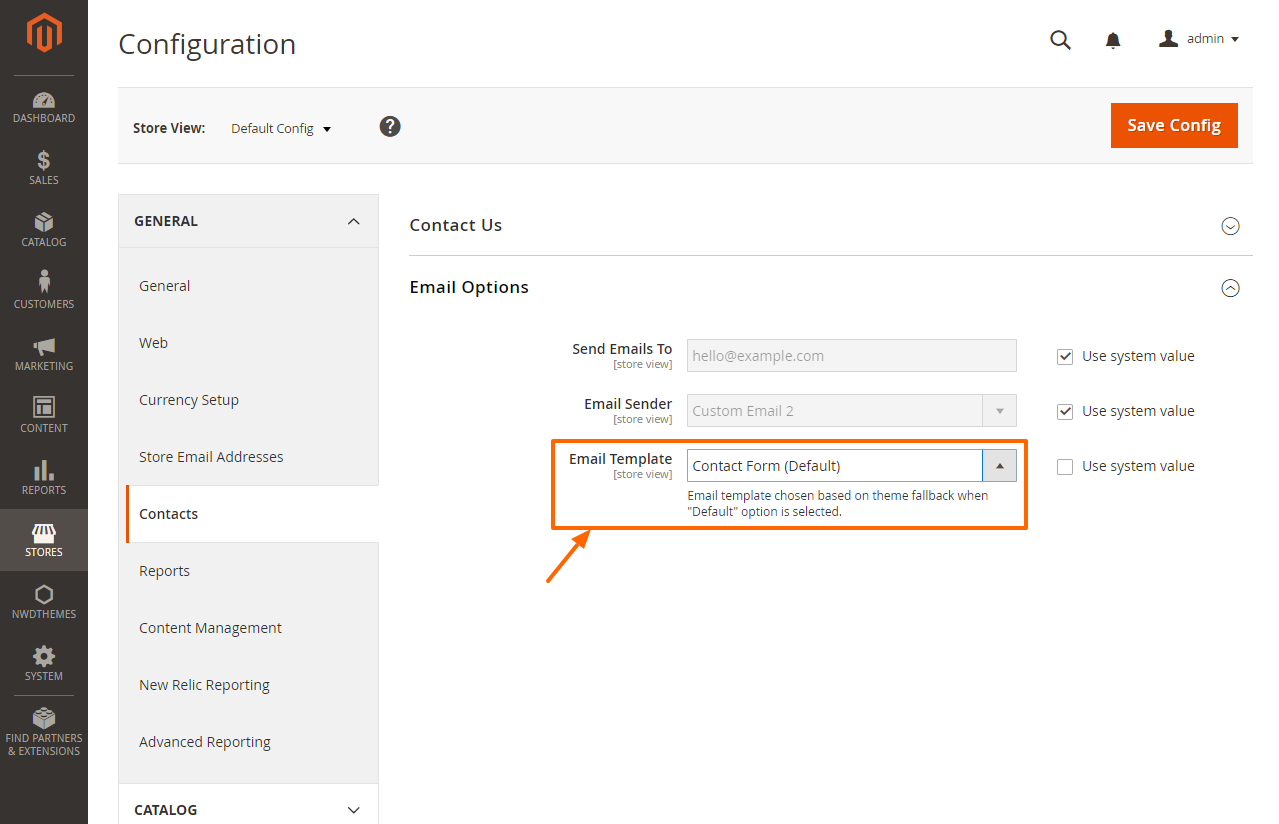
Note: you can use configuration of specific email template together with assigning email template globally. In this case global design will be applied only on default email templates and specific emails you have configured will have its own design.
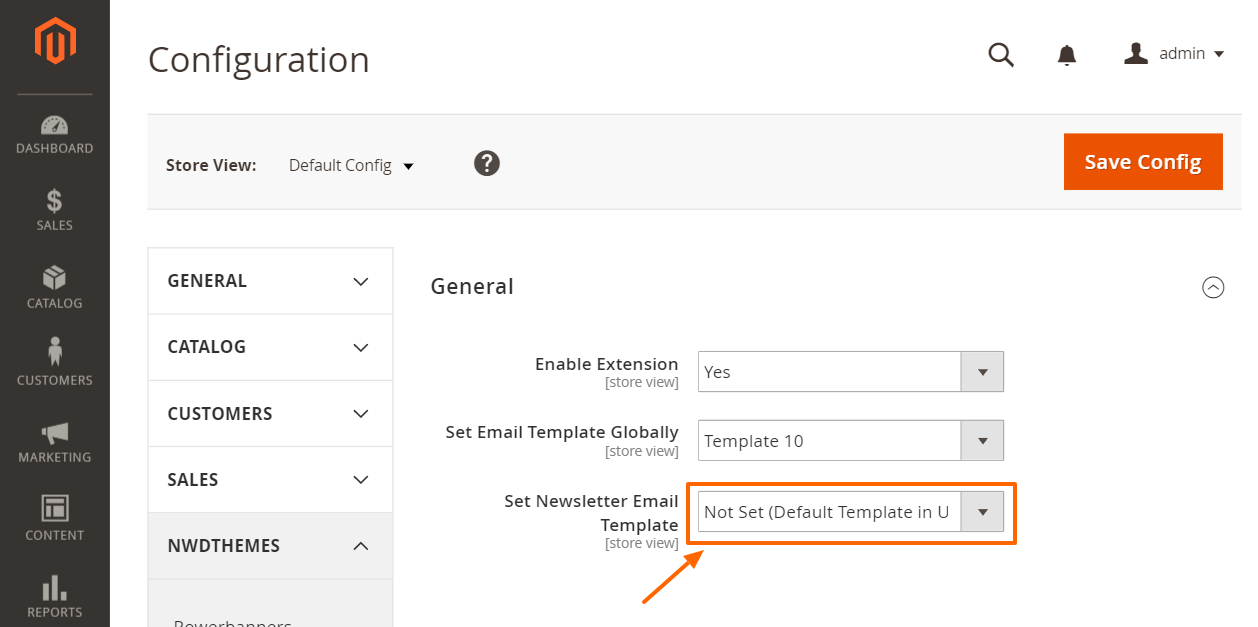
Setting Newsletter Email Template
You can set newsletter email template globally from the Configuration page. You can reach there from navigation menu or by clicking Select Newsletter Email Template or Change Template link in Templates Overview page
In the Configuration page use Set Newsletter Email Template dropdown to select which template you want to set for newsletter emails.
By default content of original email templates will be inserted right before footer of your email template. If you want it to be injected in other location just add {{original_code}} placeholder text to appropriate area of your email template.
Creating And Editing Email Templates
To create new email template simply use Create New Email Template link in Template Overview or use Add New Template button on Templates List page.

You can edit email template using Edit Template link in Actions column of templates list on Templates List page. Or you can use Edit Template link right next to assigned global or specific template in Templates Overview
Using Template Editor
Template editor gives you abilities to customize design of email template. All template editing features are explained detally in next chapters.
Changing Footer and Header
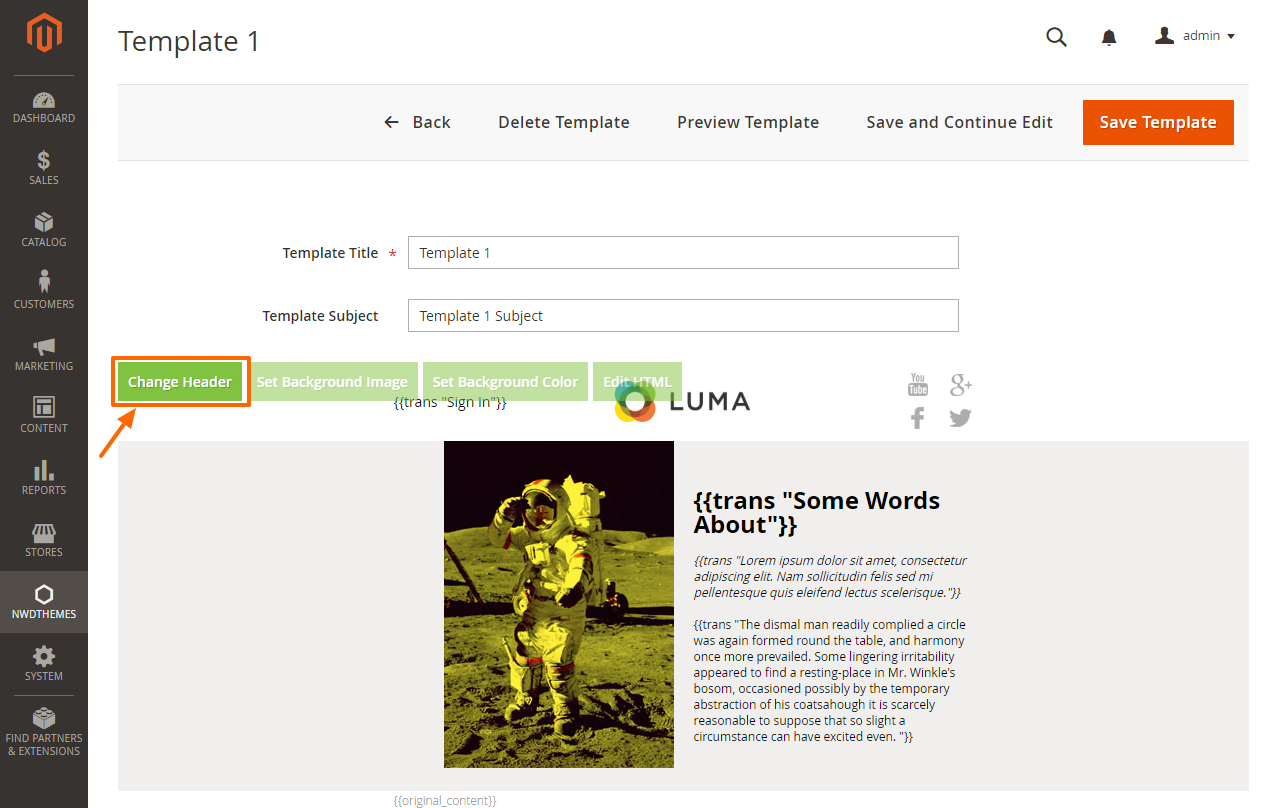
To change footer or header you can use Change Footer and Change Header buttons that are shown on hover of footer and header respectively. This will open dialog where you can choose from list of pre-designed headers and footer.
Adding and Removing Blocks
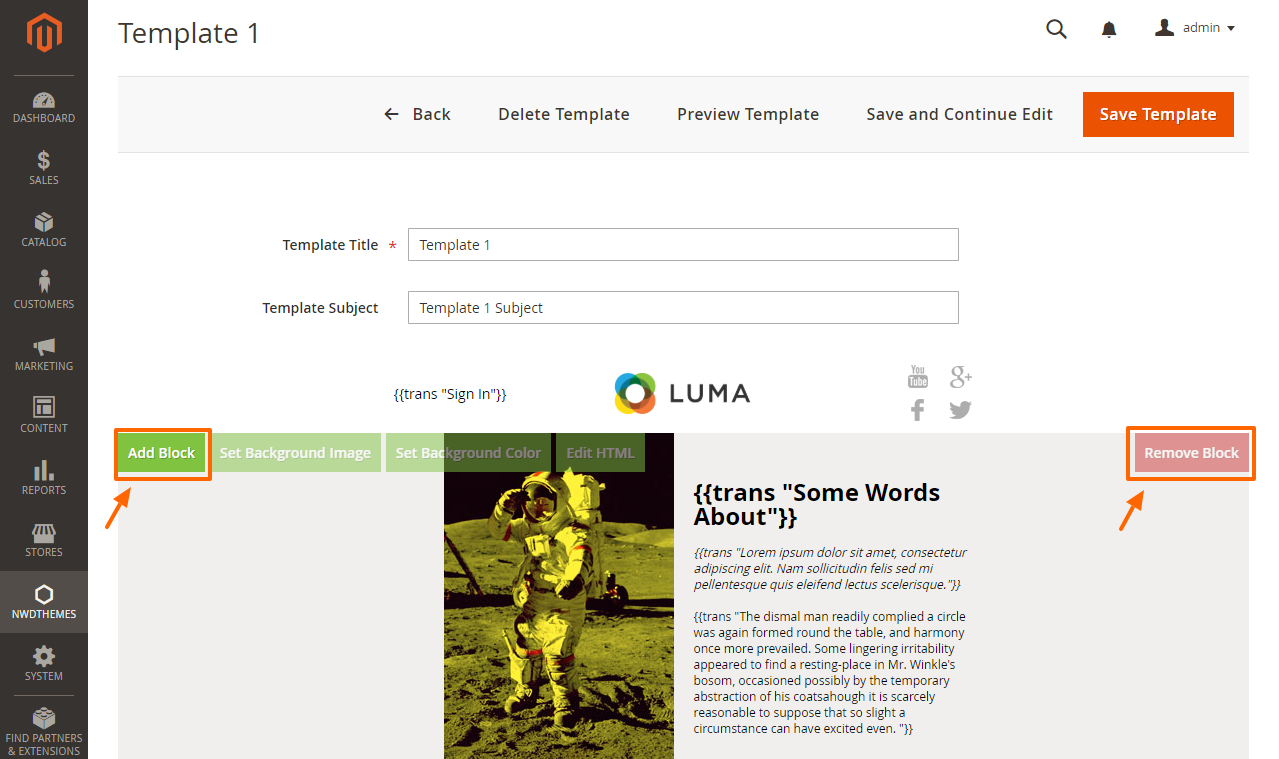
To add new block you can use Add Block button from the hover menu. When clicked this button will open list of pre-designed blocks. Click on block you like to add it to email template. To remove any added block you can use Remove Block button at the right top of each block. You can also rearrange blocks by simply dragging them into new position using drag and drop feature.
Changing Design of Elements
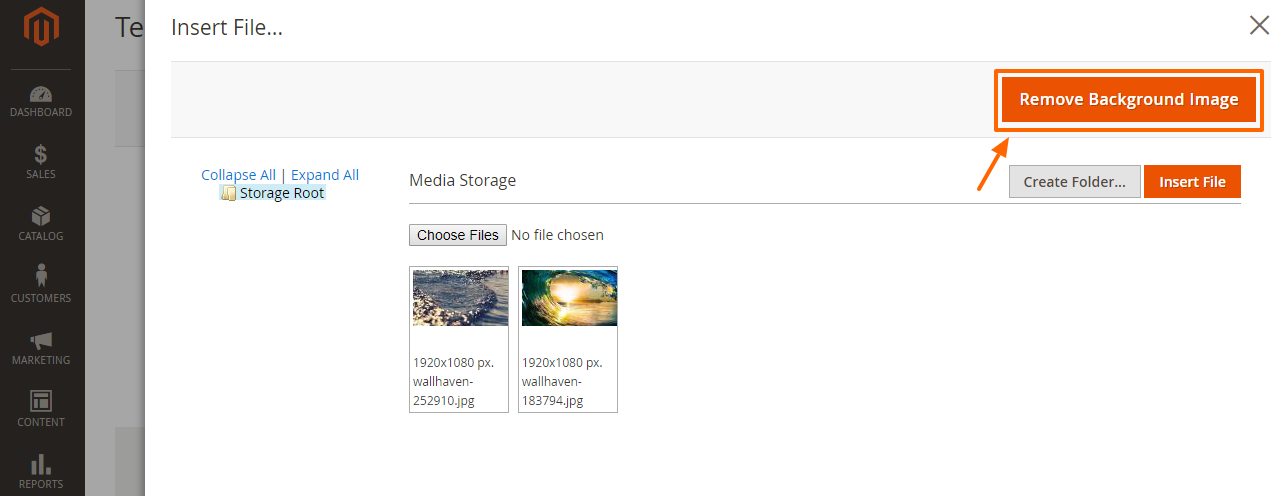
You can customize design of header, footer or blocks elements by changing their background color or by setting background image to it. To remove background image you can use Remove Background Image button in select background image dialog.
You can also modify styles of email template elements by editing inline styles using built-in HTML editor or by adding custom styles in Edit Styles section at the bottom of email template editor.
Editing Template Elements
You can edit any template text element by clicking it. This will display text editor that allows to enter your text to elements as well as insert template variables shortcodes using Insert Variable dialog triggered by Insert Variable Button.
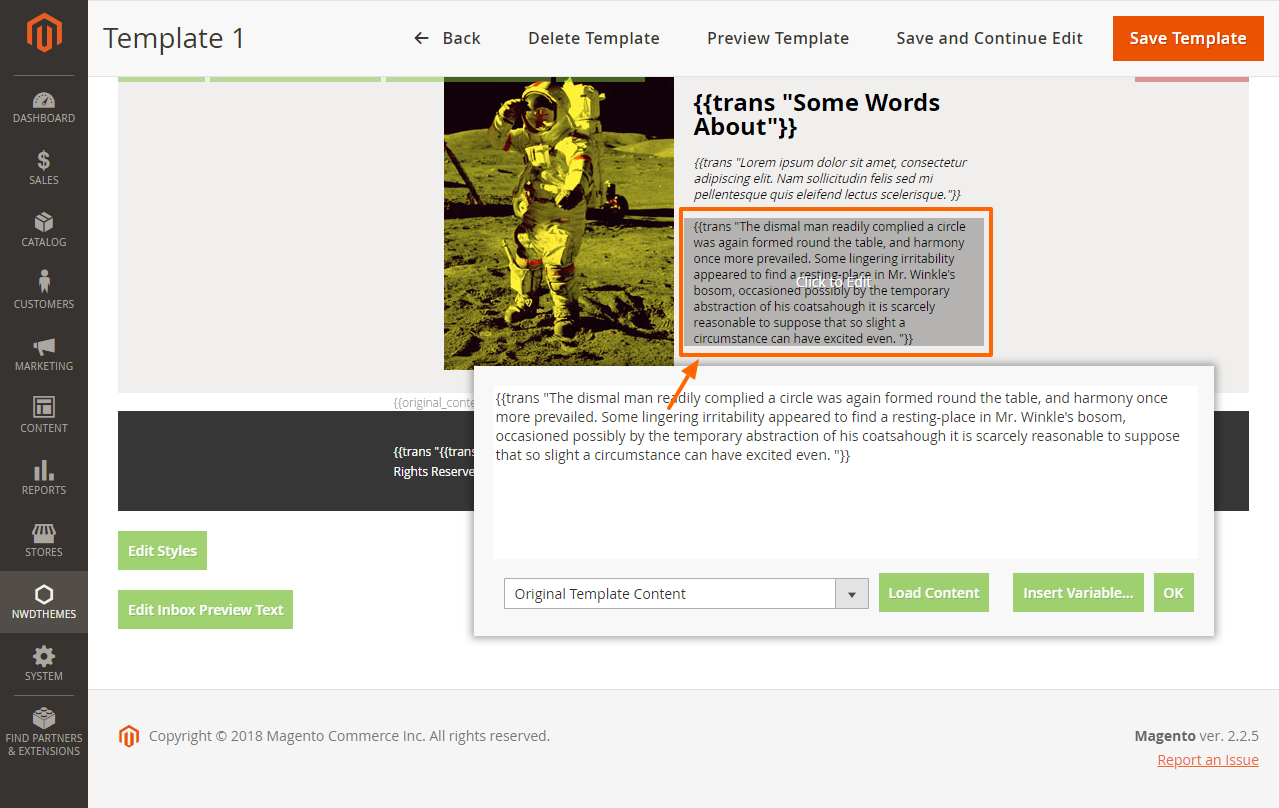
You can also use Load Content feature in text editor to load content from the original email template. This will be useful if you are creating email template for substitution of one of the original templates.
To change image elements simply click them and it will open media library dialog where you can upload and select image to insert. For logo images you can choose to use default email logo image by clicking Use Default Email Logo button in media library dialog.

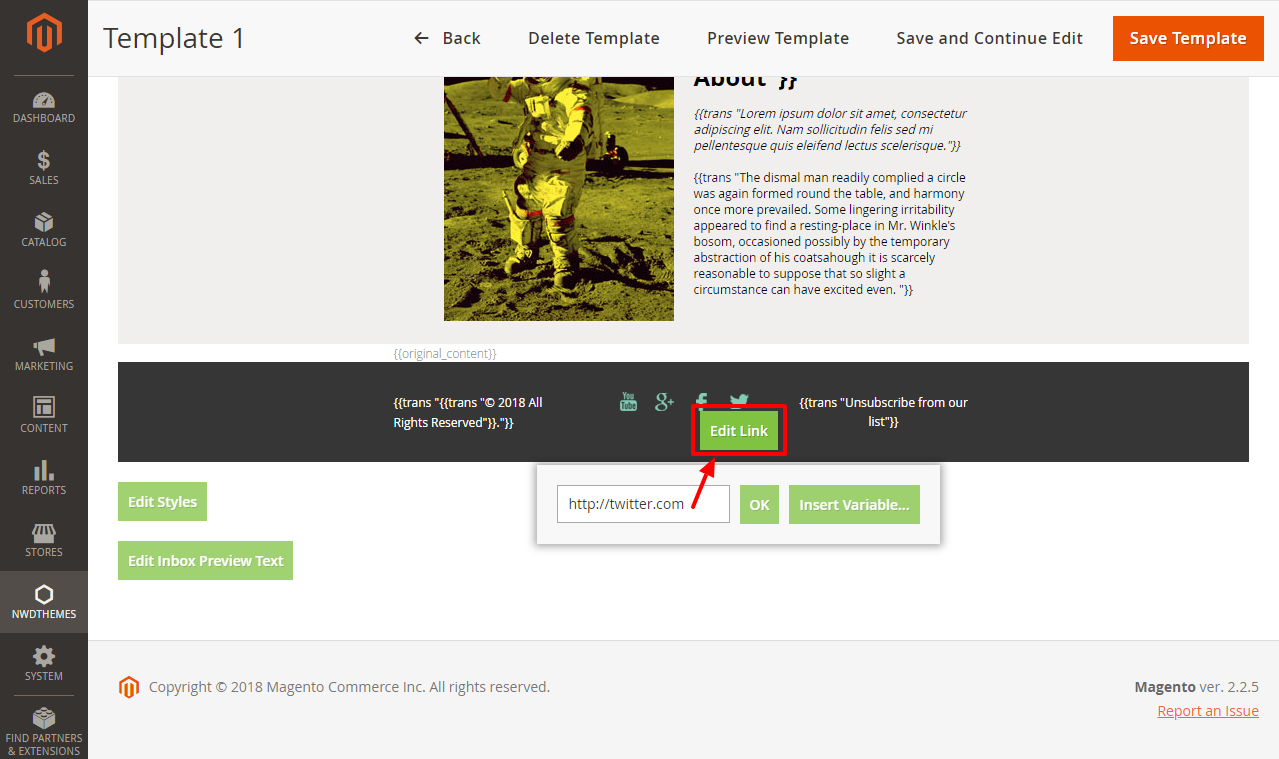
To change link assigned to element you can mouse over this element and hit Edit Link button that appears below. In edit link dialog you can also use Insert Variable button to insert Magento variable shortcode like base url.
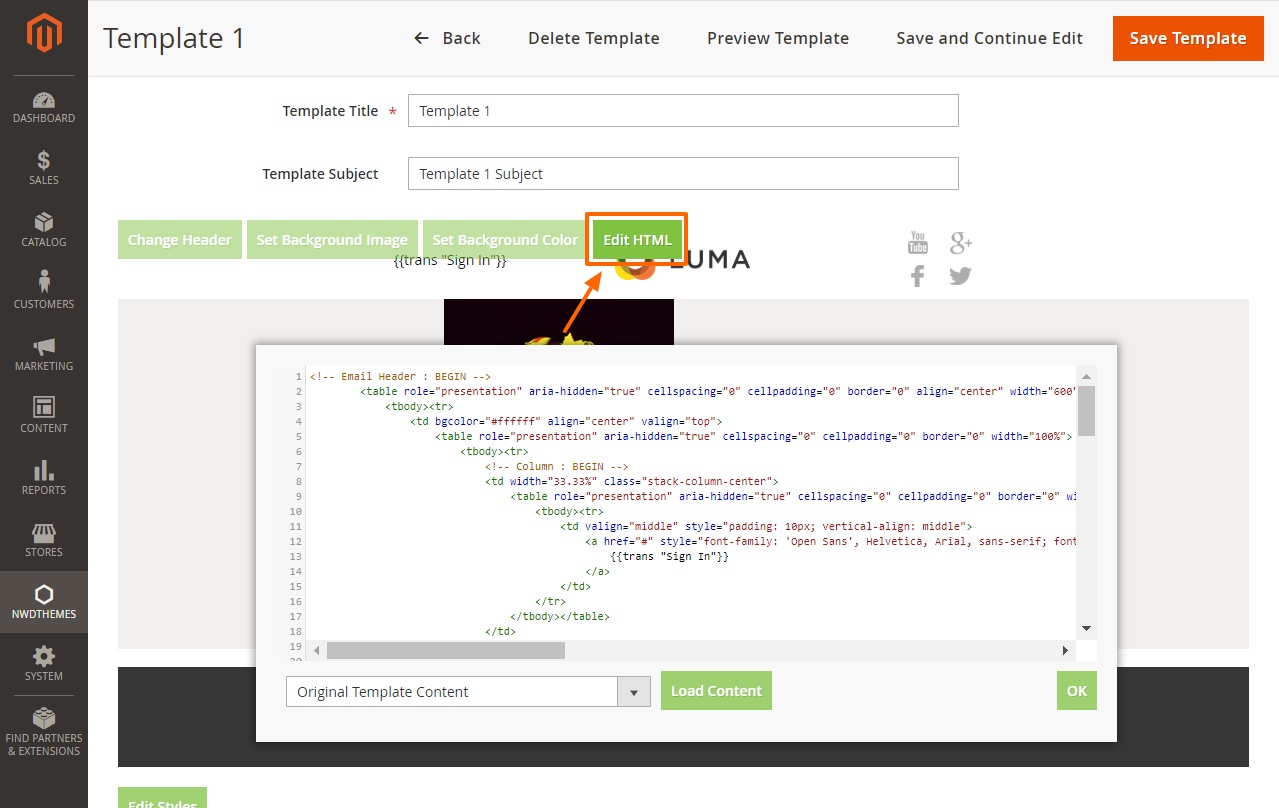
You can also remove any element item, insert your own item or change element layout in any way by using built-in HTML editor. Open HTML editor for any element by clicking Edit HTML button on an appropriate element.
Editing Template Custom Styles
You can edit and add your own email template custom CSS styles in Edit Styles section at the bottom of template editor.
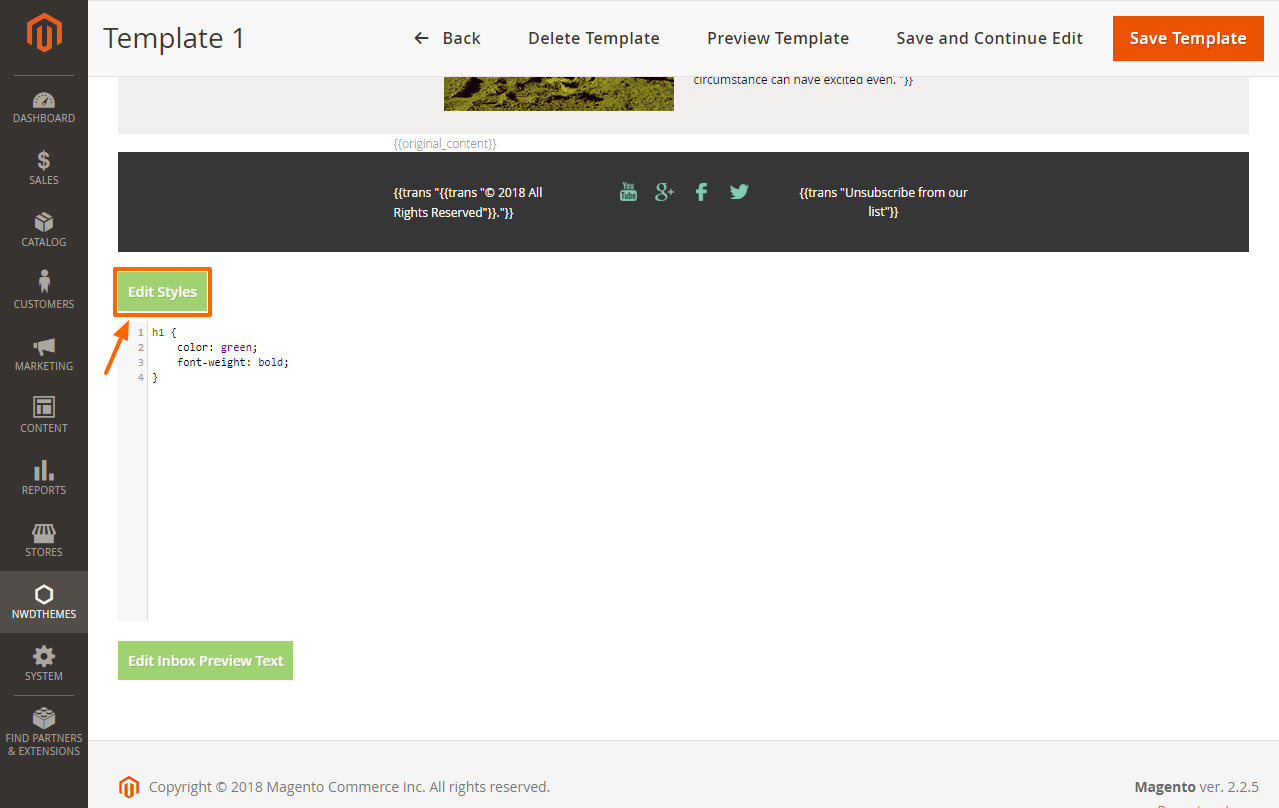
Editing Inbox Preview Text
Inbox preview text is the text that will be displayed in email applications. You can add it to make sure correct readable text will be displayed instead just first text entries from layout. For global email template starting part of original emails content text will be used as inbox preview text. Inbox preview text is editable in Edit Inbox Preview Text at the bottom of text editor.
Help & Support
Please read this documentation carefully, it will help you eliminate most of potential problems with incorrect configuration of the extension and Magento.
If you don't find the answer to your questions, please refer to this chapter for more information about support policy:
Help & Support > Support Policy.
Magento configuration, installation, maintenance, customization etc. is beyond the scope of our support. But since Magento is very popular platform you can find tons of useful tutorials and articles on the web. Here are some resources for start:
Useful links
Documentation
- Basic information about Magento:
https://magento.com/developers/magento2
https://magento.com/products/community-edition - System Requirements:
http://devdocs.magento.com/guides/v2.0/install-gde/system-requirements.html - Magento documentation:
Getting Started
Developer Documentation - Installation Guide:
http://docs.magento.com/m2/ce/user_guide/magento/installation.html
Community
- Magento Forum:
https://community.magento.com/ - Stack Overflow:
http://stackoverflow.com/questions/tagged/magento2?sort=newest - Magento Stack Exchange:
http://magento.stackexchange.com/
Support Policy
Support hours: 10AM – 6PM GMT+1 time, Monday – Friday. The support response time is 24-48 hours.
Support for our items includes:
- Fixing bugs and reported issues
- Responding to problems regarding the item and its features
- Providing updates to ensure compatibility with new software versions
Item support does not include:
- Customization and installation services
- Support for third party software and plug-ins
- Support for Magento: configuration, installation, maintenance etc.