
Communicating with your customers is essential to smooth working of your online business. It’s a good practice for the store owner to notify them about different things like orders, subscriptions, promotions, invoices etc. This makes your clients trust your business and motivates them to return to your online store more and more.
When a customer places an order, it is an event that triggers many actions that follow. One of them is to notify your customer about the details of the order and payment confirmation. You also provide a timeline for the shipment and try to up-sell and cross-sell through email messages.
To save your time you can choose extension that helps you to manage Magento 2 emails in easier way. For example we recommend Magento 2 Email Templates extension. Or you can learn how to do it yourself using tutorial below.
In Magento 2 it’s possible to manage email templates and set them to be sent automatically to your customers on some of triggered events. Today we will consider some steps to create custom email templates:
- Add new template
- Create custom template based on Magento default template
- Create custom template from the scratch
- Override default email templates in the theme
- Insert Variables*
1. Add custom template
Navigate to Marketing -> Email Templates (1) section in your Magento admin panel.
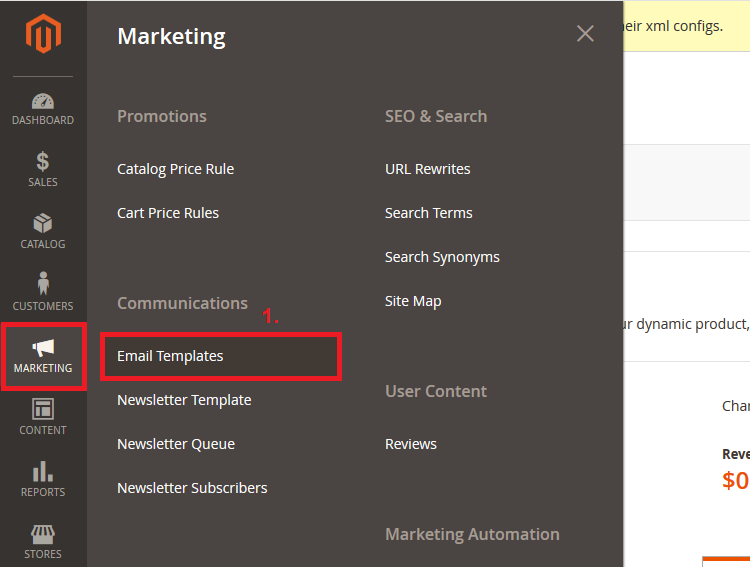
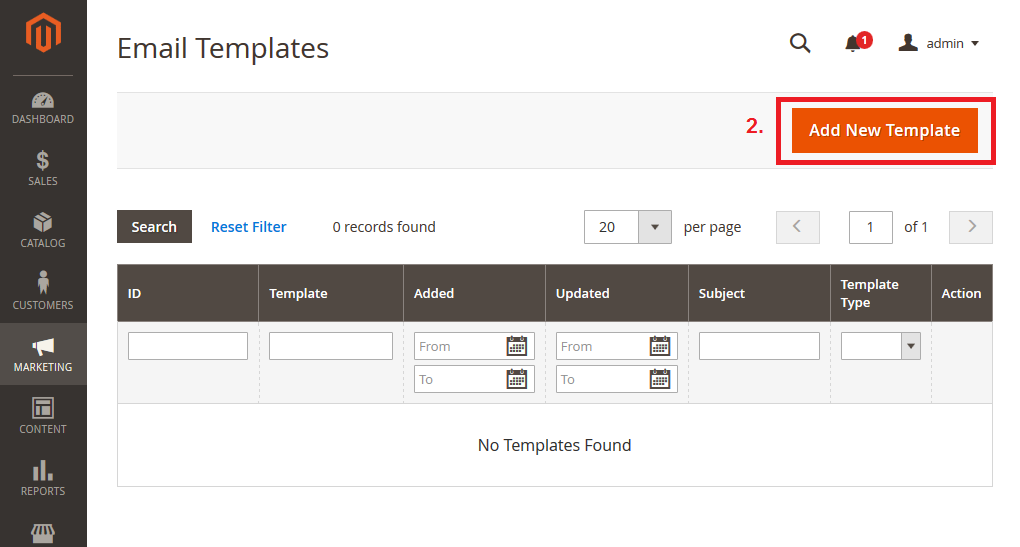
By default the list is empty and here we will add our first email template. At the top right click the “Add New Template” (2) button.
2. Create custom template based on Magento default template
In this section you can configure your custom template by overriding the default Magento email template with a bit tweaking.
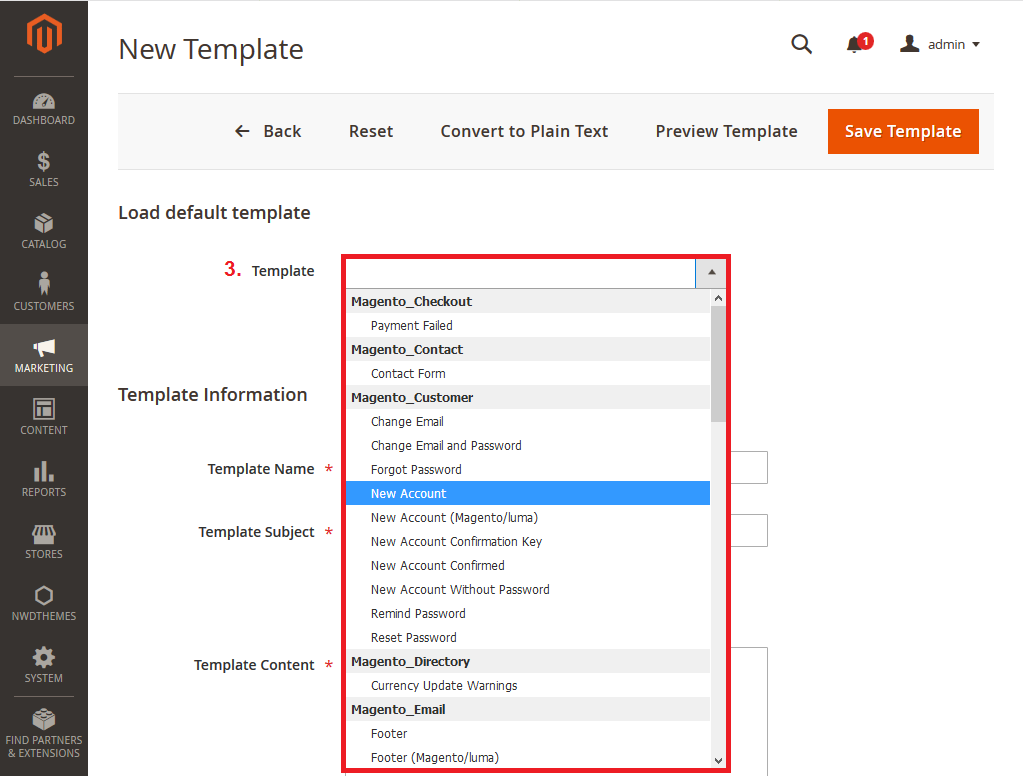
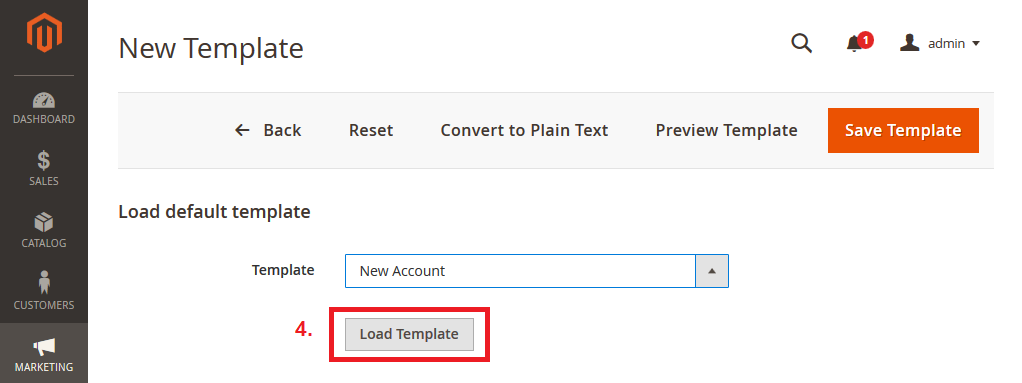
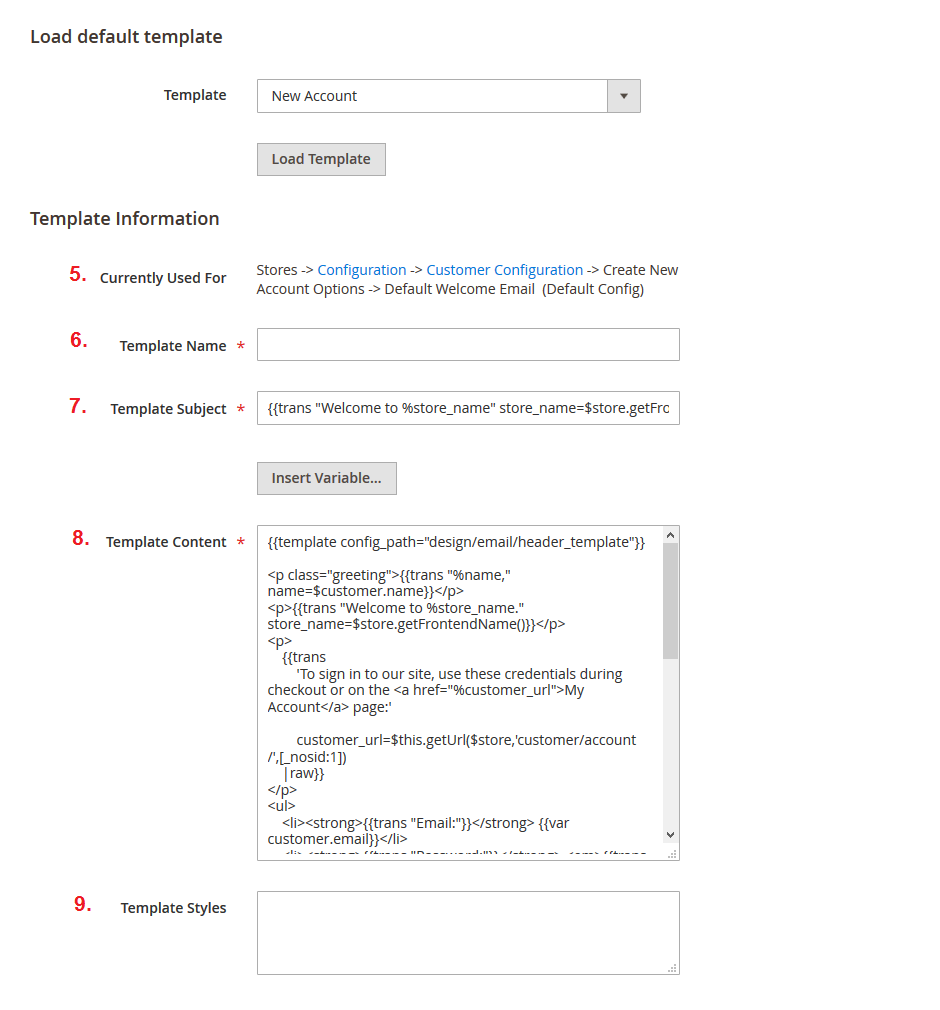
This method is pretty simple and all we need in this case is to select one of predefined Magento templates and load its content for edit. To achieve this click the Template (3) dropdown, choose the necessary template from the list and click the “Load Template” (4) button below.
After that Template Subject (7) and Template Content (8) will be filled automatically and you will also see where this template is applied in the Currently Used For (5) row. Go through the code and edit the info to fit your needs. Then give a name for your custom template in the Template Name field. If it’s necessary you can also apply your custom CSS rules in Template Styles textarea and add unique design and fill for your template.
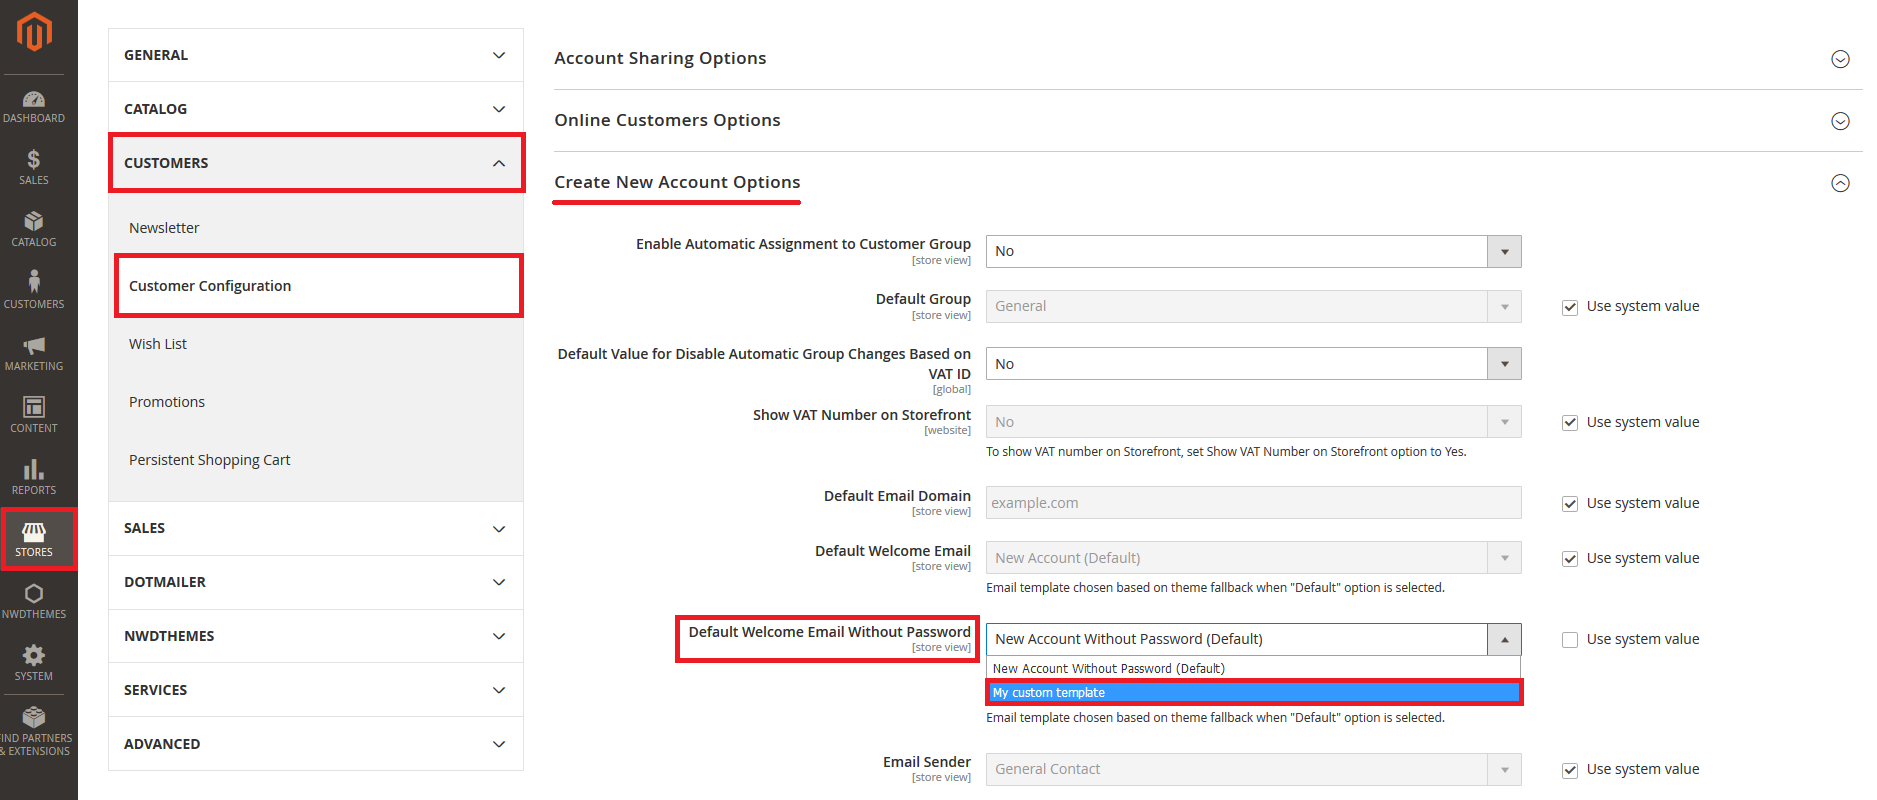
Once you finish with editing, you should now substitute the default Magento email template for a specific event with your recently created custom template. Look into Currently Used For field once again . This is the default config where the template is used. In our tutorial we used “New Account” template, so we need to navigate to Stores -> Configuration -> Customers -> Customer Configuration -> Create New Account Options -> Default Welcome Email section and apply our custom template. You can apply different templates to trigger the same event for different store views or make it available globally throughout your website.
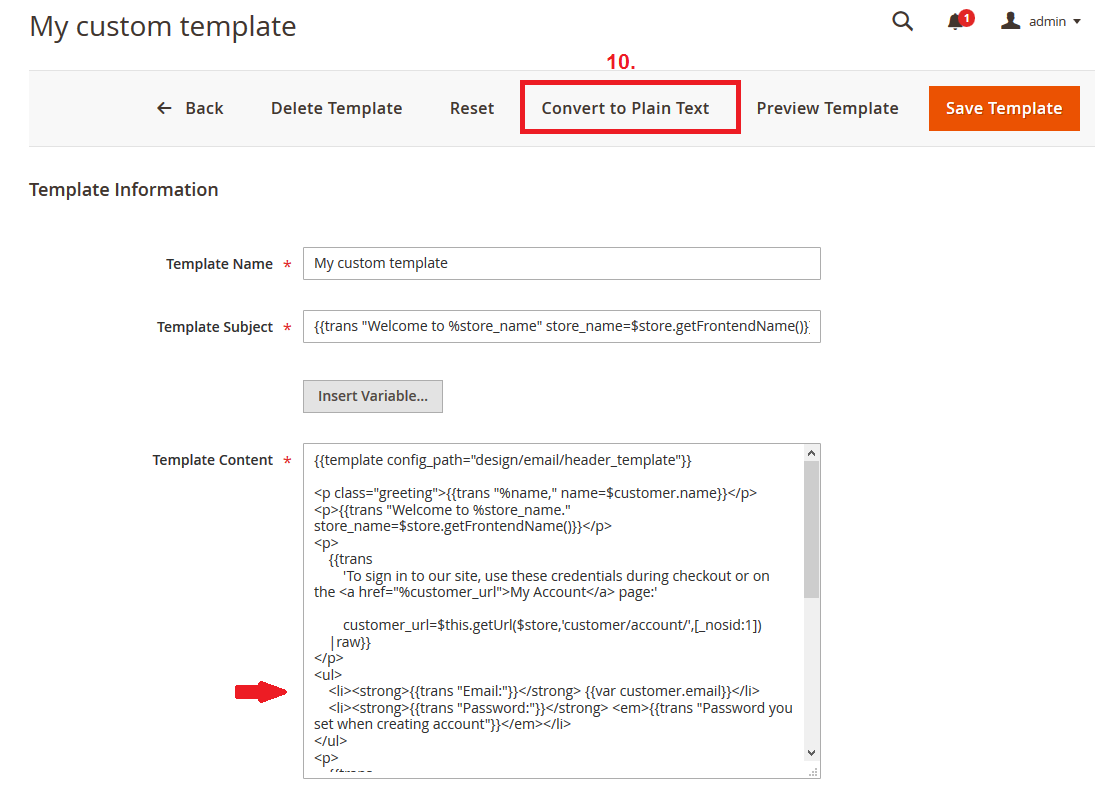
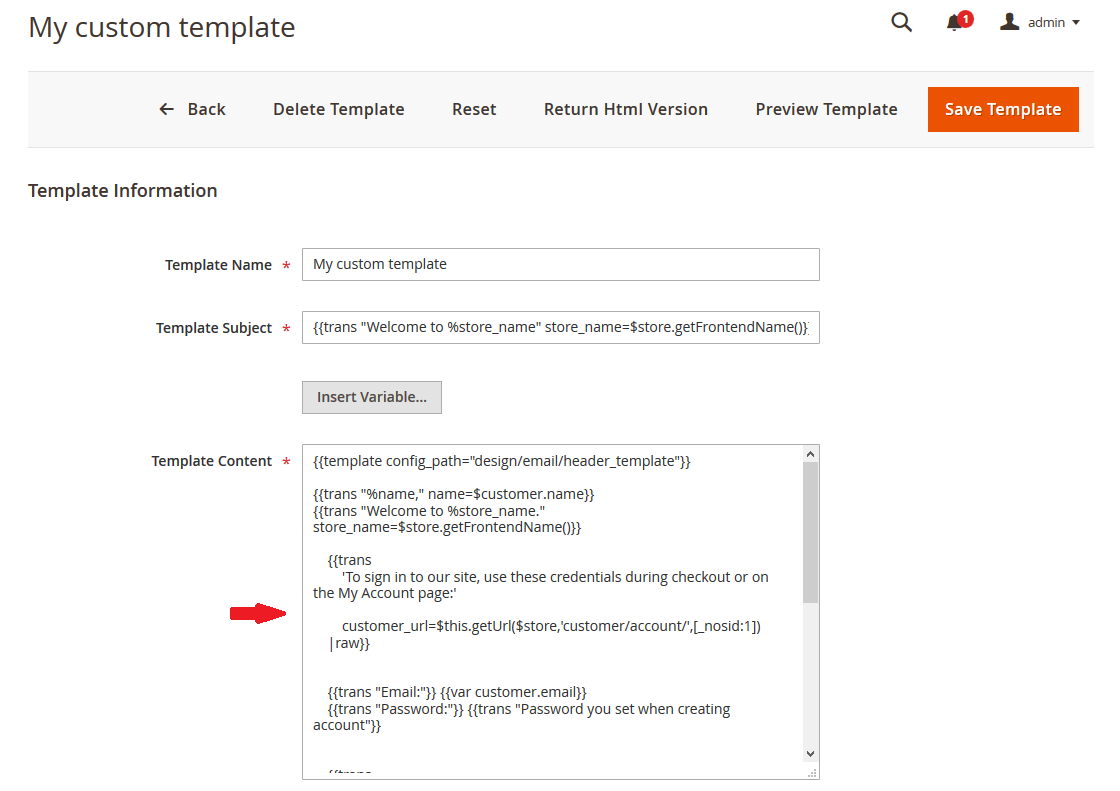
Note: some email clients are set to not show emails built with HTML, so you may need to make the content of your email to be in plain text, so it will be visible to all your recipients. Click on the “Convert to Plain Text” (11) button to achieve this. After that all HTML tags from the email content will be removed.
2. Create custom template from the scratch
This method is much harder then the previous one and it requires strong knowledge of Magento email templates hierarchy, variables and HTML/CSS. It’s not suitable for beginners and it’s mostly used by the developers.
3. Override default email templates in the theme
You can also override default Magento templates in your theme. Depending on what download method you’ve used, location of default email templates may vary:
- Download via Composser or Magento official site
In this case the path to default email template will be – ..\vendor\magento\{module}\view\frontend\email\email_template.html.
For example: ..\vendor\magento\module-sales\view\frontend\email\order_new.html.
- Clonning the GitHub repo
In this case the path to default email template will be – ..\app\code\Magento\{namespace_module}\view\frontend\email\email_template.html.
For example: ..\app\code\Magento\Magento_Sales\view\frontend\email\order_new.html.
Storefront themes are conventionally located under ..\app\design\frontend\{company}\{theme} directory and you need to copy & pate the default email template into this folder, so the path will look like this – ..\app\design\frontend\{company}\{theme}\{namespace_module}\view\frontend\email\email_template.html.
For example: ..\app\design\frontend\MyCompany\MyTheme\Magento_Sales\view\frontend\email\order_new.html.
4. Insert Variables*
There is an option to “Insert variables” while you edit email template content. In Magento 2 there is a list of predefined variables that will be helpful to extend your email template with some additional info
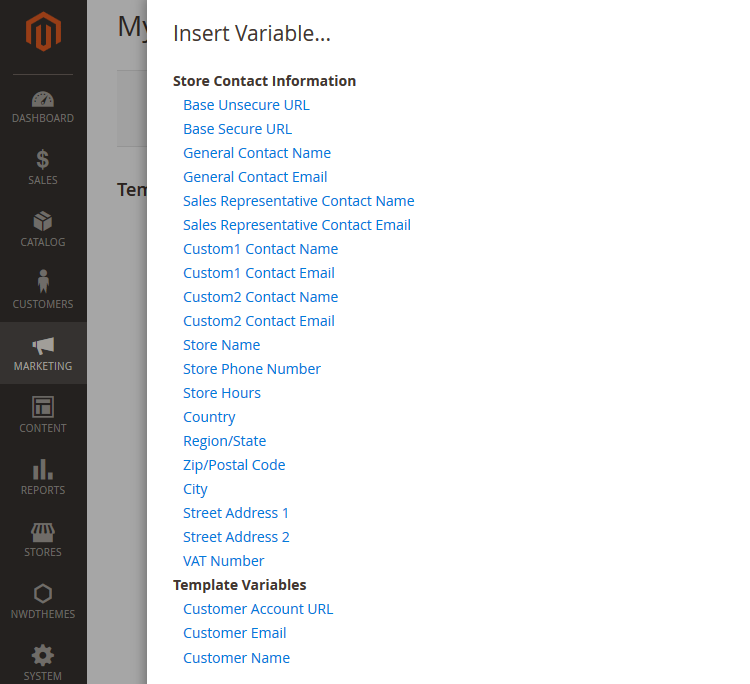
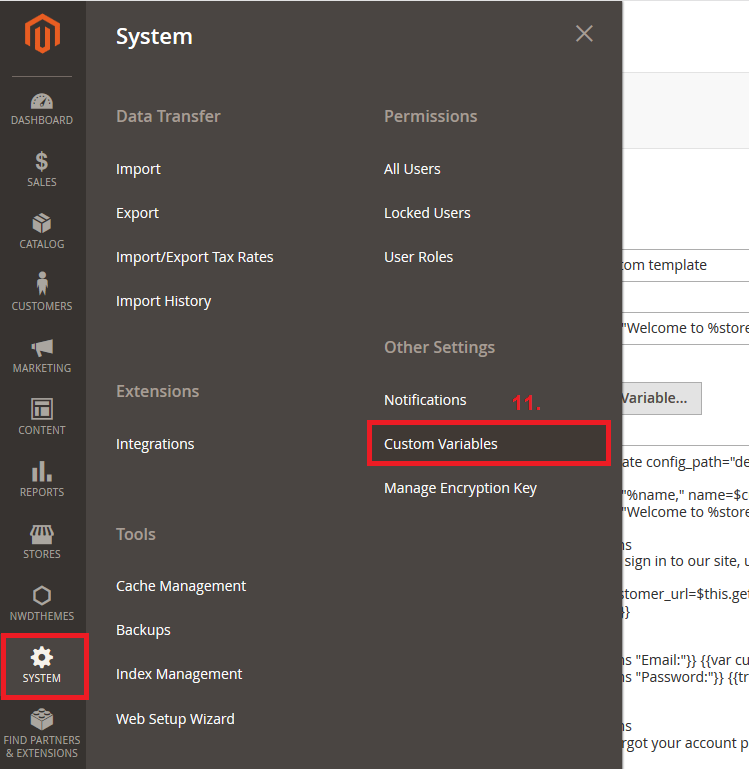
The list is pretty limited but you can extend it with your own custom variables under the System -> Other Settings -> Custom Variables (11) section.
Note: The list of available variables depends on the template you use. The template-specific variables can be found in a ‹!–@vars @–› comment section at the top of each email template file. For example, look at app/code/Magento/Customer/view/frontend/email/account_new.html.
- Some useful variables that can be used in emails:
Billing Address:
{{var formattedBillingAddress|raw}}Shipping Address:
{{var formattedShippingAddress|raw}}Shipping Description:
{{var order.getShippingDescription()}}Email Order Note:
{{var order.getEmailCustomerNote()}}Order ID:
{{var order.increment_id}}Order Items Grid:
{{layout handle=”sales_email_order_items”order=$order area=”frontend”}}Payment Details:
{{var payment_html|raw}}In the end, preview your changes and save your template. Hope some of the info from this tutorial will be helpful for you.